| Summary: If your SD card is not working/Camera Won’t Read SD Card, first clean the card and the camera, then try the fixes we list here. Even if your card is corrupted, using an SD card recovery software like Stellar Photo Recovery is always a last-ditch option. |
|---|
Table of Content
- Camera Won’t Read SD Card: 5 Methods to Fix It
- Why Your Camera Is Not Reading Your SD Card?
- Prerequisites To Fixing Your Camera Won’t Read SD Card
- Solutions To Your Camera Won’t Read SD Card
- Things To Remember- Camera Won’t Read SD Card
Camera Won’t Read SD Card: 5 Methods to Fix It
If you find that your camera is not reading your SD card and is giving you trouble, you can probably fix it yourself, without needing to buy a new one just yet.
Try the fixes listed in his article, and you might just be able to fix your memory card error, and quite possibly, the data on it.
Why It Matters?
You may find your brand new SD card not working, or that your camera is not reading your SD card.
People tend to assume that they have received a defective SD card, but this is usually not the case.
This article is for you if you are in the following situations:
- Your camera is not reading your SD card.
- Your computer is not reading your SD card but your camera is.
- Your camera and camera are not reading your SD card.
- Nothing is reading your SD card.
- You are getting a “memory card error” message on your camera and/ or computer.
Also Read: How to Recover Photos and Videos from Memory Card?
Why Your Camera Is Not Reading Your SD Card?
The table below outlines the main reason why your Why Your Camera Is Not Reading Your SD Card:
Note: The distinction between point two and three is that if you get one, you can fix it. However if you face both errors, then you need specialized software to proceed, like Stellar Photo Recovery.
Prerequisites To Fixing Your Camera Won’t Read SD Card
Before we proceed any further, you need to go through this short checklist to make sure that your camera is not reading your SD card.
Before You Begin, Do This
It goes without saying that before you assume that something is wrong with your camera/ SD Card/ computer, you should:
- Clean the (often golden) contact points on your SD card,
- Clean the contact points inside the camera SD card slot,
- Thoroughly use compressed air to clean your SD card reader on the computer,
- Update your camera firmware to the latest available version, and
- Disable the antivirus on your computer.
Also Read: How to Recover Photos Disappeared from SD Card?
Solutions To Your Camera Won’t Read SD Card
If you have followed our instructions up until this point, it is safe to assume that we are dealing with one of five situations;
- Memory card corruption,
- Physical or logical damage to the SD card,
- A defective memory card,
- A corrupted memory card, or
- A malfunctioning camera.
That said, we have four fixes for you to try before you take your camera to the service center.
Also Read: Best Ways to Fix Corrupt SD Card/ Memory Card
-
Check For Physical And/ Or Logical Errors
You will need access to a Windows PC for this method. Connect the SD card to the PC.
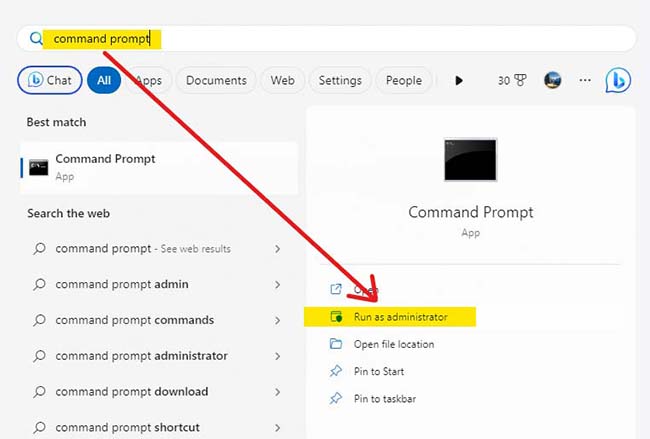
1. Open any command line interface and run it as an administrator. We have used the command prompt. Other CLIs you can use are Terminal and PowerShell.

2. Note the “Drive Number” of the SD card you want to fix. You can see this in “my computer”. In our case, the Drive Number is (F).

3. Type in the following command into the command prompt: “chkdsk F: /x” without the apostrophes, and hit enter.

4. You may get this error message. If you do, hit “Y” and press enter. Close all programs and restart the computer and try again.

5. If you do not get the error message in step 4, you will see this message instead.
The chkdsk /x command scans for any errors on your drive, and then repairs them for you automatically.
Once the repair is complete, try using your SD card in your camera again.
Also Read: How To Fix “SD Card is Damaged, Try Reformatting it” Error?
-
Update Your SD Card Drivers (Windows)
You can do this really easily.
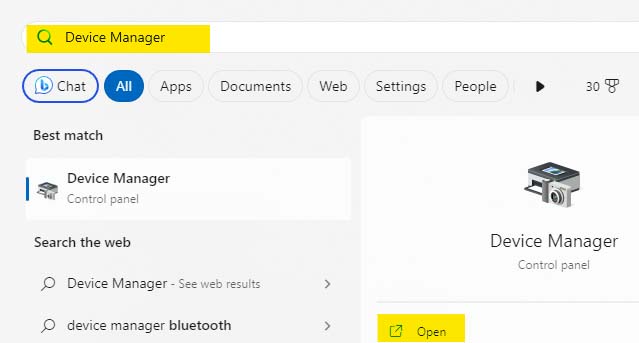
1. Right-click the Start icon and go to “device manager”. You could also left-click the start icon and type in “device manager” and click on it.
2. Navigate to “disk drives” and expand the collapsed menu. Right-click your SD card in the menu, click on “Update driver” and let Microsoft work her magic. If the driver is out of date, Windows will automatically update it for you.
3. Unplug your SD card, and try putting it in your camera to see if it works now.
-
Format/ Reformat The SD Card
If you find that your camera is not reading your SD card even now, then we need to format your SD card to make it usable again.
Formatting your SD card will make you lose all the data on it.
Also Read: How to Recover Photos from Formatted SD Card?
If the data is valuable to you, you might want to look at using SD card recovery software.
This process is outlined in the next step.
1. Press “Ctrl” + “E” to open up the Windows File Explorer.

2. Windows 11, navigate to “This PC” (available in the left-hand tab of the file explorer menu.)
If you are on Windows 10, navigate to “This computer”.
If older version of Windows, navigate to “My Computer”.
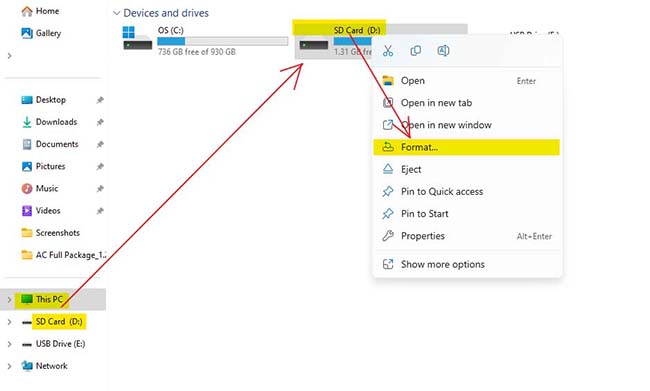
3. Select your SD card with a single left click. Then, right-click it, and click on “Format”.
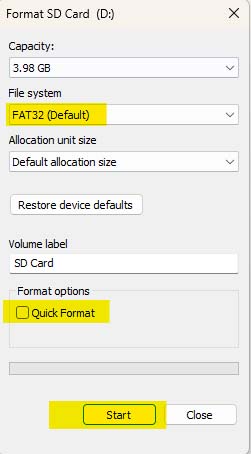
4. The rule of thumb is that if your SD Card is less than 32 GB in capacity, format it to FAT32. If it is bigger than 32 GB, go with exFAT. If it is smaller than 32 GB, but you shoot video on it, go with exFAT.
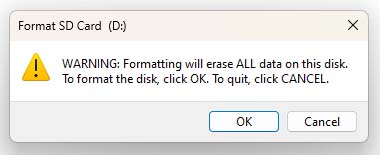
5. Click “OK” in the warning message that pops up.
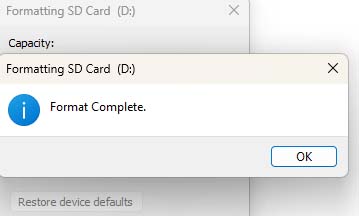
Wait for the formatting of the SD to finish. Then, try putting it inside your camera to see if it works.
Also Read: How to Recover Deleted Photos from SD Card?
-
Use SD Card Recovery Software
As we said, if you have data on your SD card that you would not like to lose, then you will need to deploy an SD card recovery software, such as Stellar Photo Recovery.
The software is completely free to preview. This means that you do not have to spend any money at all until you are 100% sure that your data can be recovered.
1. Navigate to the Stellar Photo Recovery webpage and hit the download button.

2. Navigate to wherever the download got saved, and open it. Click “Yes” in the pop-up box that appears next.
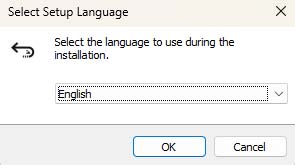
3. Select your language and click “OK”.
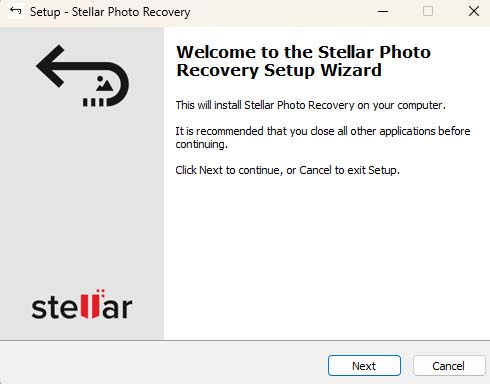
4. Click “Next”.
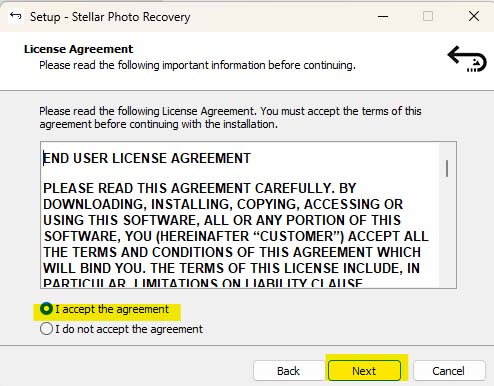
5. Accept the terms of the agreement and click next.
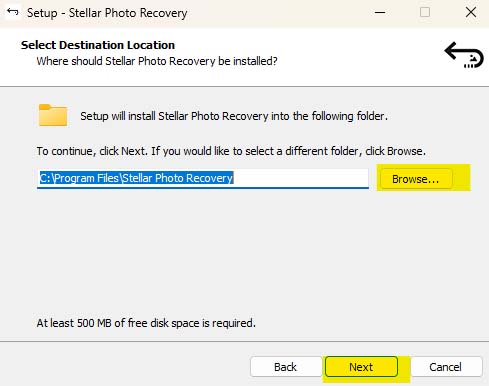
6. Choose where you want the program to be installed by clicking browse, or leave it as it is (recommended) and click “Next”.
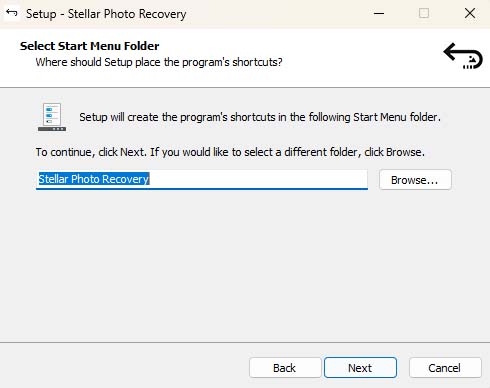
7. Choose where you would like the shortcut to open the program to be created by clicking browse. You could also just leave it at default and click next, and this will create a shortcut in the start menu (recommended).
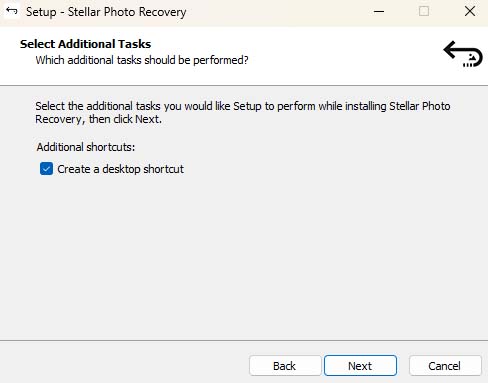
8. You can choose whether or not to create a desktop shortcut by checking/ unchecking the box and then hitting “Next”.
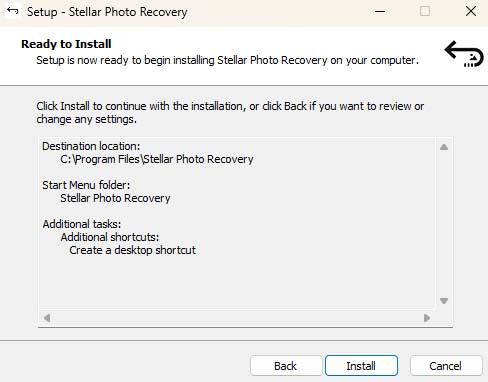
9. Hit the “Install” button and wait for the installation to complete.
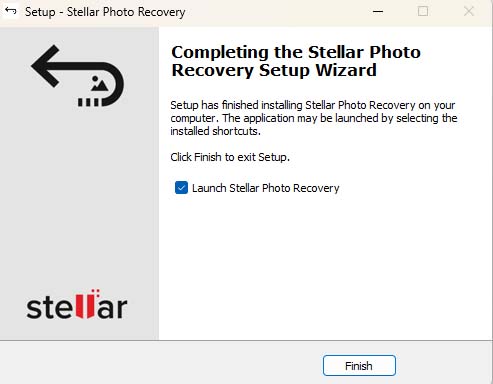
10. When the required files have been downloaded and the installation is complete, hit “Finish”. This will open Stellar Photo Recovery
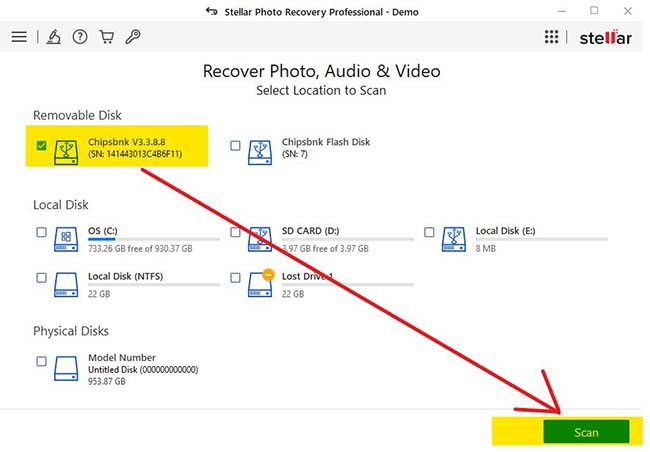
11. Click the box next to your SD Card. Then, click Scan.
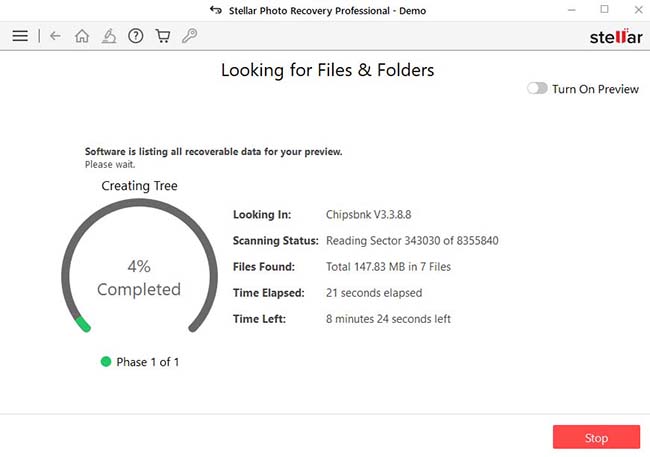
12. The scan may take some time to complete. You can click the “Turn On Preview” toggle in the top right corner to preview any files you may be able to recover.
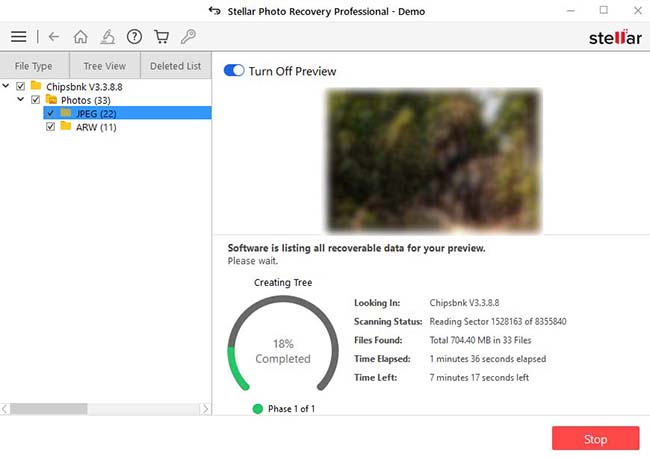
13. As you can see, you will be able to see a full preview of what the data will look like once recovered.
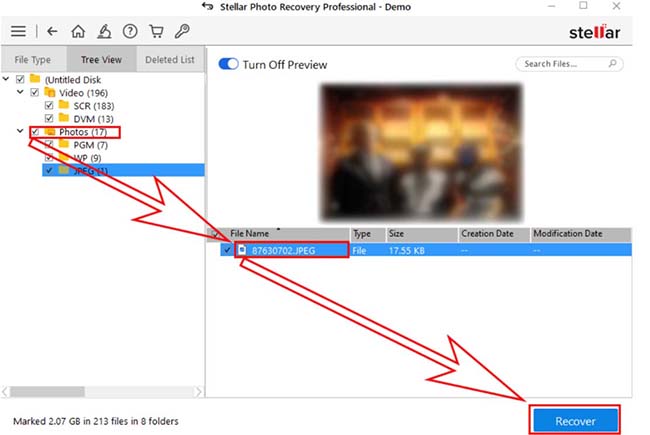
14. If you wish to export the recoverable files that you can preview, click the recover button. To recover the data, you need to purchase a license to use the software, various durations of which are available at this link.
However, if software alone doesn’t recover your lost or inaccessible files, Stellar SD Card Data Recovery Services is your next option. They specialize in advanced recovery processes for damaged SD cards that software might struggle with.
Also Read: Get the Activation Key of Stellar Photo Recovery Software
Things To Remember- Camera Won’t Read SD Card
Just because your camera is not reading your SD card does not mean that your SD card is shot and done for.
There are a whole host of factors that could be the reason why your camera is not reading your SD card.
The point is, just because your SD card is acting up, doesn’t mean all hope is lost.
You can try the free fixes listed in this article and there is a very good chance that it will be usable again.
With that, we hope that you found this article useful, and we’ll see you in the next one.


