| Summary: In this blog, we will explore what constitutes a C drive on a Windows system and various methods to clean a C drive. The safest and effective method is to wipe it with professional file erasure software such as BitRaser File Eraser. |
|---|
Unlike other drive partitions, cleaning C drive in Windows 10 system isn’t straightforward. The reason being that the C drive is the storage location of your PC’s operating system. Cleaning C drive, therefore, poses the risk of eliminating the operating system or other important files that can cause unnecessary hassle.
इस पोस्ट को हिंदी में पढ़ने के लिए यहां क्लिक करें।
|
Special Offer from Stellar Get exclusive offer on data erasure software and service, drop an email to help@stellarinfo.com |
|---|
Let’s first see what is stored in C drive.
Apart from usual data, the following mainly constitute C drive:
- Operating system: C drive is the home of all operating system files.
- App data: Files of all the apps you’ve installed reside in the C drive.
- Junk: All deleted files (files sent to Recycle Bin) are stored in C drive.
- Temporary files: PC generates all types and kinds of temporary files, such as caches, log files etc. These are stored in the C drive.
- User data: User files such as downloaded files, synced cloud data etc. are stored in the C drive.
- Desktop files: Desktop is a part of C drive and all desktop files form part of the C drive.
You can explore all the stored data in C drive by following the path: Settings > System > Storage.
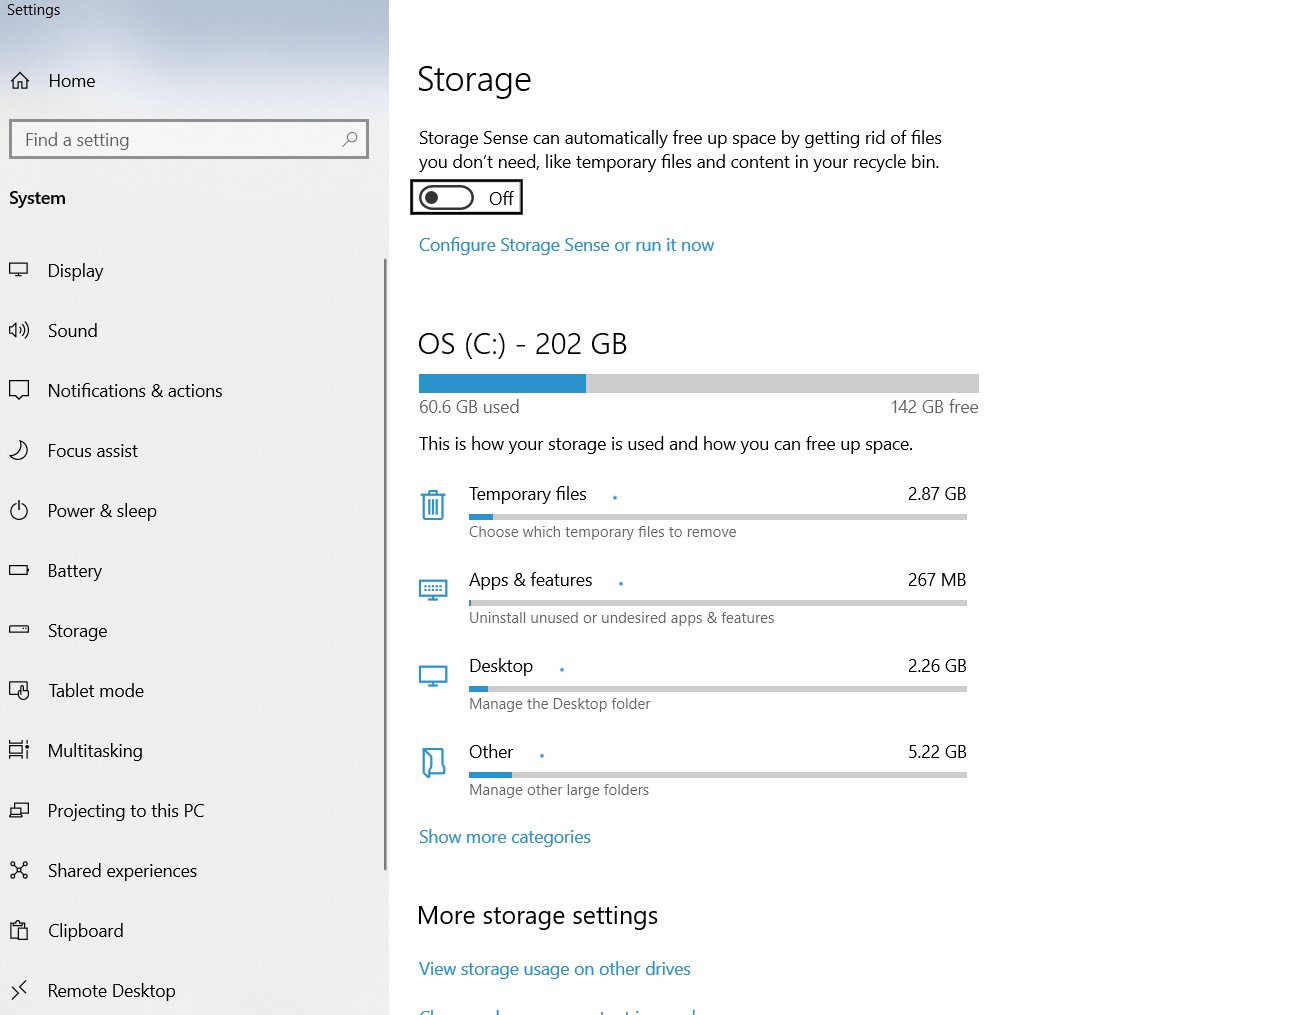
Image 1: Stored data in C drive
How to Clean C Drive?
Here are some effective methods that can help you clean C drive in your Windows 10 system and free up some storage space.
A. Use Storage Sense
Storage sense is a built-in Windows app that helps you free up some storage space on C drive. The app optimizes storage on C drive by automatically removing unwanted temporary files. Here is how to use the app:
- Go to Windows settings
- Then, go to System > Storage
- On the next screen, you’ll see an option to turn on Storage Sense
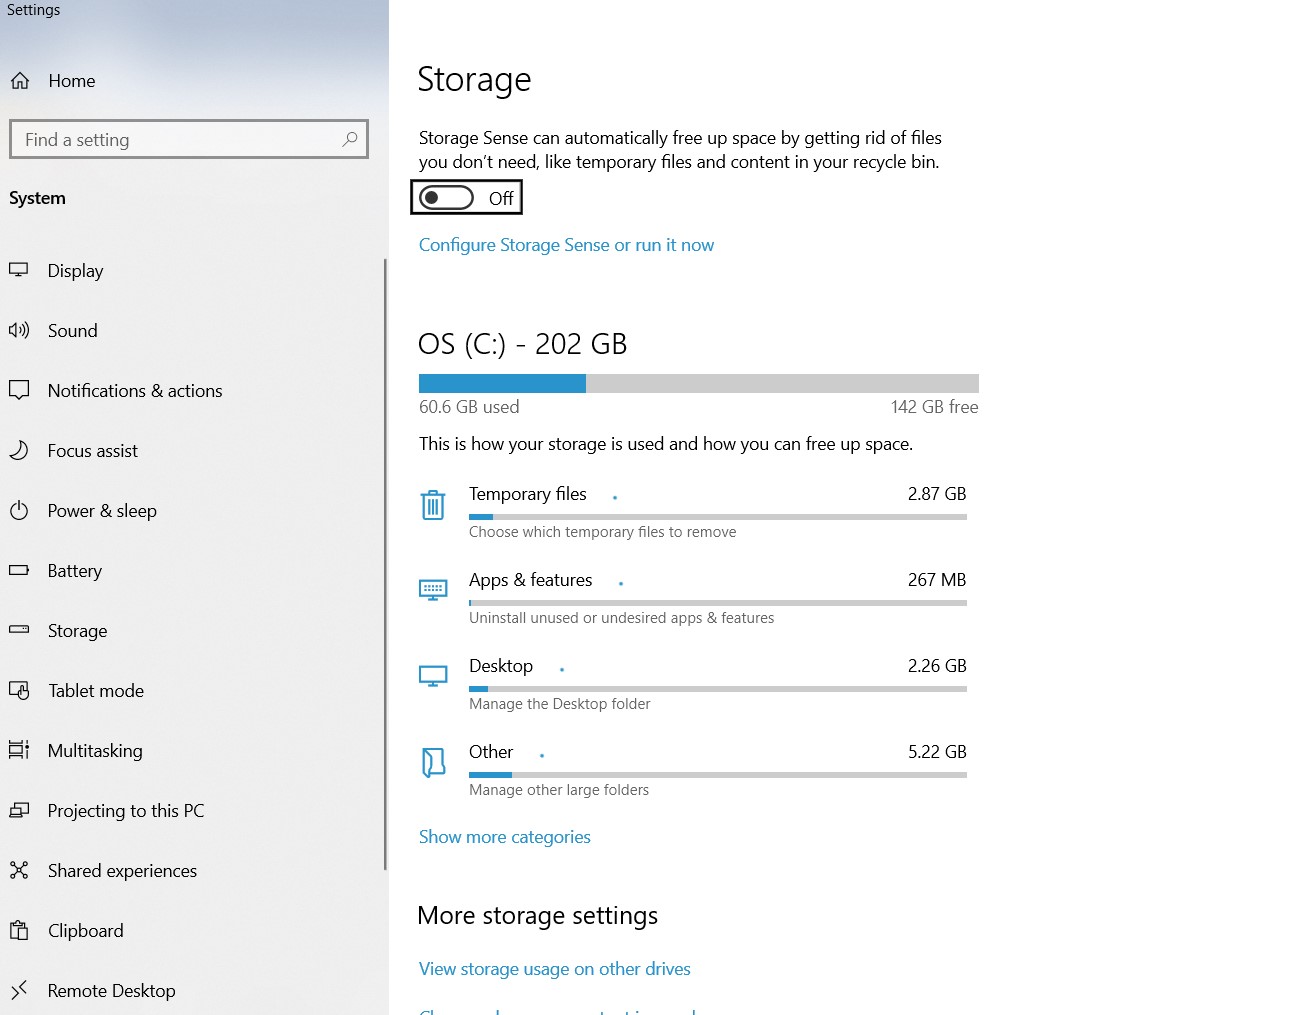
Image 2: Storage sense in Windows 10
You can also customize the app by automating certain features. For e.g. you can enable the app to automatically delete Recycle Bin files, temporary files etc.
B. Use Disk Cleanup
Disk Cleanup is also a built-in utility in Windows OS, designed to delete temporary and other type of data from a drive. Here is how you can use Disk Cleanup to clean C drive:
- Go to Search tab and type Disk Cleanup
- Launch the app and select C drive
- Click OK
- A dialog box will appear. Select Temporary Files from the list and click OK
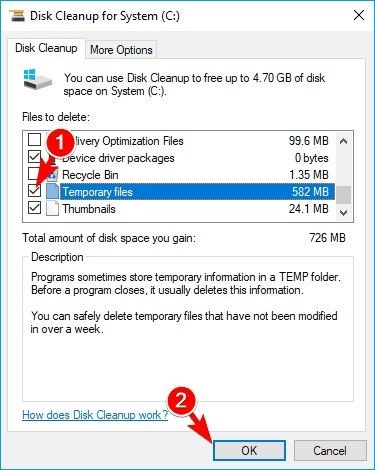
Image 3: Disk Cleanup in Windows 10
C. Empty Recycle Bin
Recycle Bin contains the files that you have processed for deletion. These files, if left undeleted, can occupy a large chunk of space in the C drive. It is therefore advisable to delete them.
To do so, right-click the Recycle Bin folder on the Desktop and click Empty Recycle Bin.
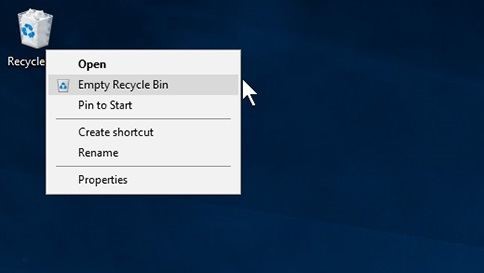
Image 4: Emptying Recycle Bin in Windows 10
D. Compress Installation Data
You can compress installation files and other data on your C drive to save disk space. Installation files are generally large in size and by compressing them you can free some extra space. Here is how you can do that:
- Open Windows Explorer and click My PC
- Right click on C drive and select Properties
- In properties window, click on the General tab
- At the bottom of the window, you’ll see an option Compress this drive to save disk space
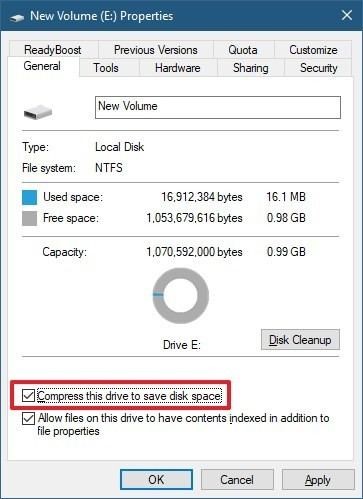
Image 5: Compressing C drive files
- Select this option and click OK
E. Use File Erasure Tool
Did you know that files deleted via system settings/Windows explorer aren’t deleted permanently? These deleted files still reside in the hard drive and can be recovered by data recovery software. In order to permanently delete data from your PC, you can use a file erasure software, such as BitRaser File Eraser. The software is designed to permanently erase all types of data from your storage media. You can use BitRaser File Eraser to wipe any type of file in your C drive permanently and effectively. Watch the video on “how to clean C drive in Windows 10.”
- Download and install BitRaser File Eraser
- Run BitRaser File Eraser
- On the main interface of the software, you can see the list of items you can delete by using the software.
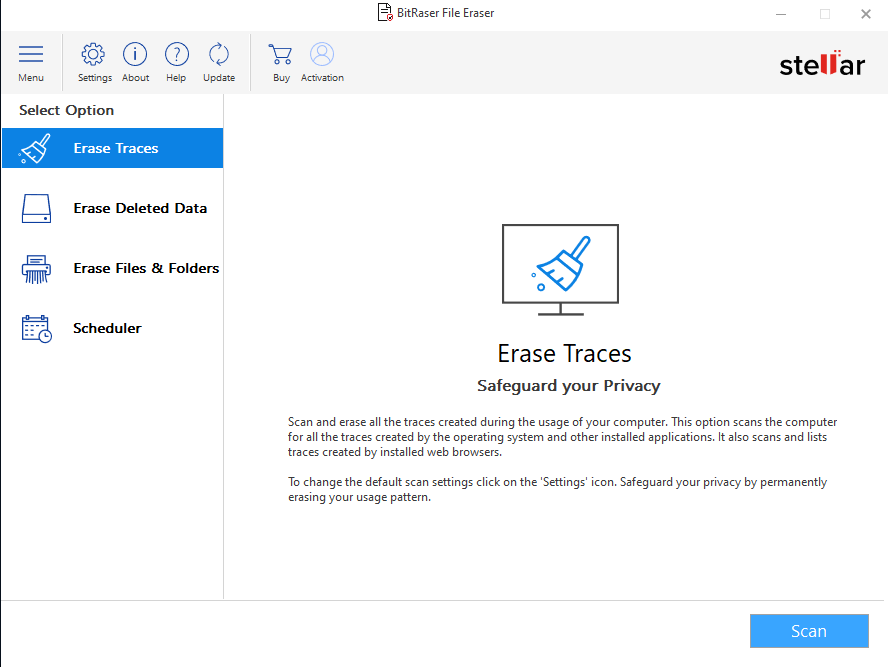
Image 6: BitRaser File Eraser interface
- Click on Erase File & Folder in the left pane.
| [NOTE]: You can also choose Erase Traces to erase traces created by OS and other applications or Erase Deleted Data to permanently wipe deleted data. |
|---|
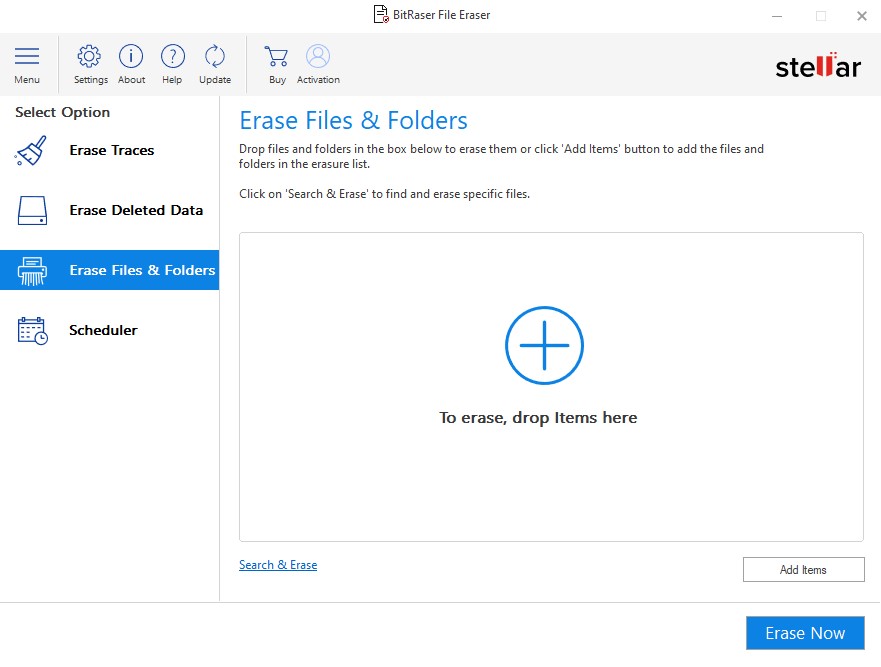
Image 7: Erase Files and Folders feature
- Click on “Add Items” button and a dialog box will open. Expand the selection under “This PC” and scroll down to access the hard drive
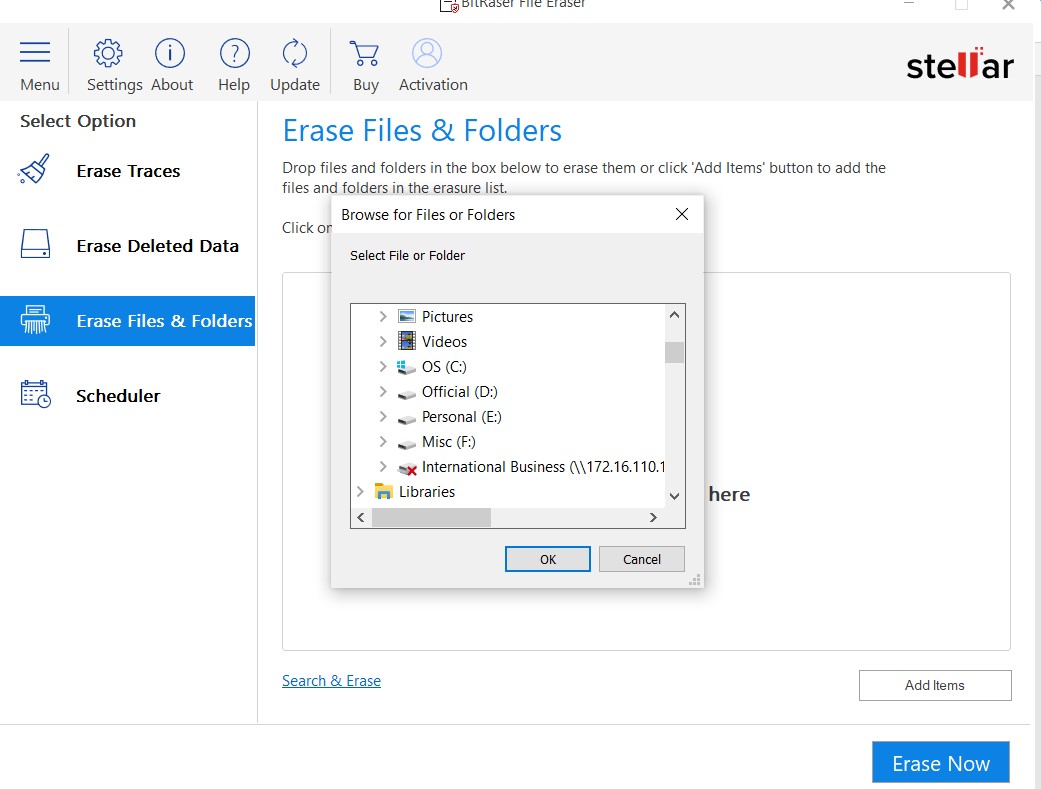
Image 8: Selecting Files and Folders for Erasure
- Next, expand the C drive and select the specific files you wish to erase
- After selection, click on Erase Now button
- Next, a dialog box will appear to confirm erasure. Click Proceed
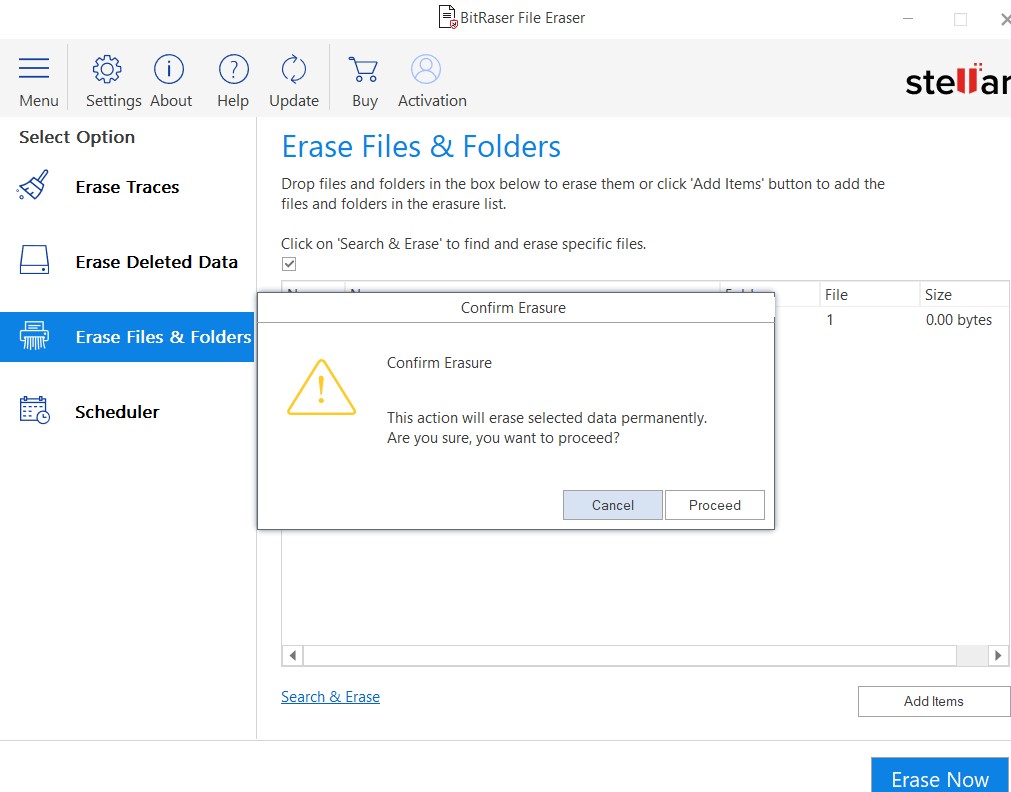
Image 9: Confirm Erasure dialog box
- This will erase all the selected files.
|
Final Thought You need to take caution while deleting data from the C drive as the operating system and other important files reside there. In this blog, we’ve mentioned some easy and safe methods to delete unwanted data from the C drive and free up some space. The most effective way to wipe data from the drive is by using a file erasure tool such as BitRaser File Eraser. This tool is designed to wipe any type of data from your storage device, beyond the scope of recovery. |
|---|


