| Summary: One of the most loved features of BitRaser Drive Eraser – particularly for our corporate and enterprise clients – is ISO customization. Once you’ve acquired a valid license for Drive Eraser, you can head over to BitRaser Cloud Console. Here, you find all the options you need, to customize a BitRaser Drive Eraser ISO image. |
|---|
In this guide, we will tell you how to modify BitRaser ISO in 12 steps.
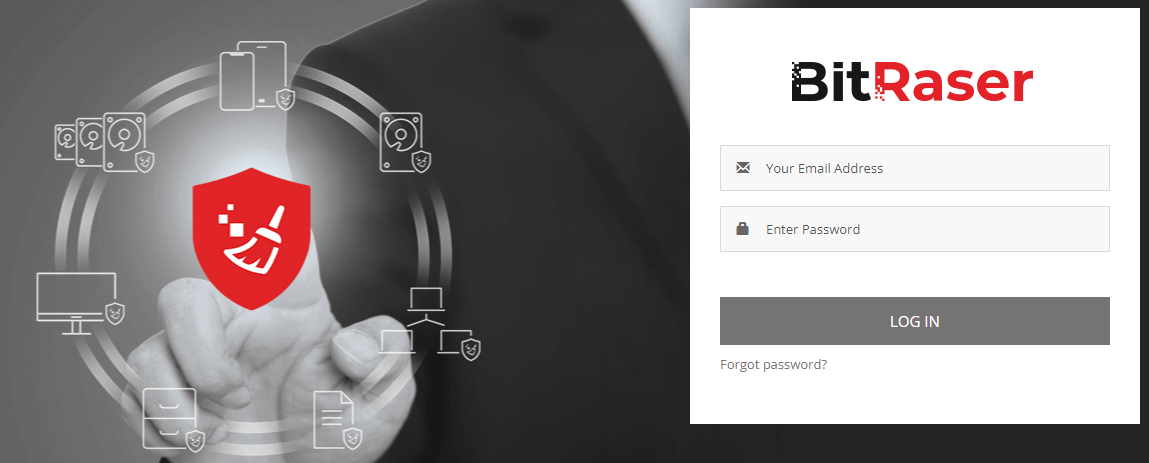
Step 1: Log in to http://www.bitrasercloud.com/ to start BitRaser ISO customization. You should have received your login credentials after your purchase via email.
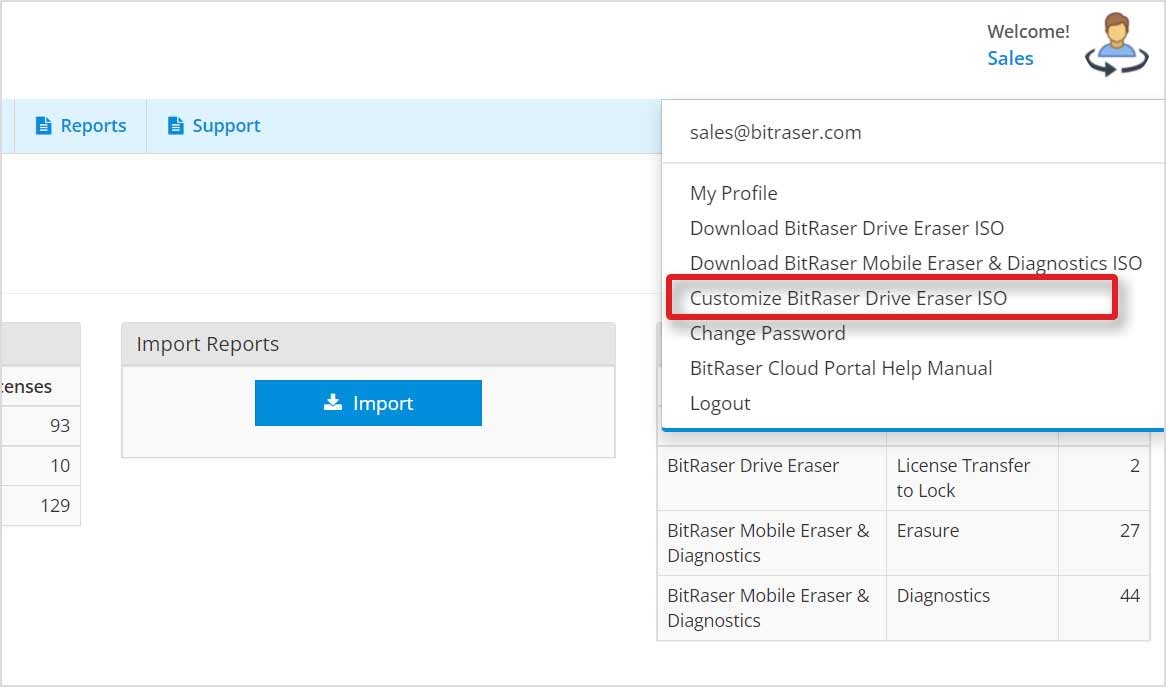
Step 2: On the top right corner you should see a profile icon with your username. Click on it.
Step 3: Once you click on the profile icon, you will see a drop-down menu. On the drop-down menu click on Customize BitRaser Drive Erase ISO.
This window should pop up.
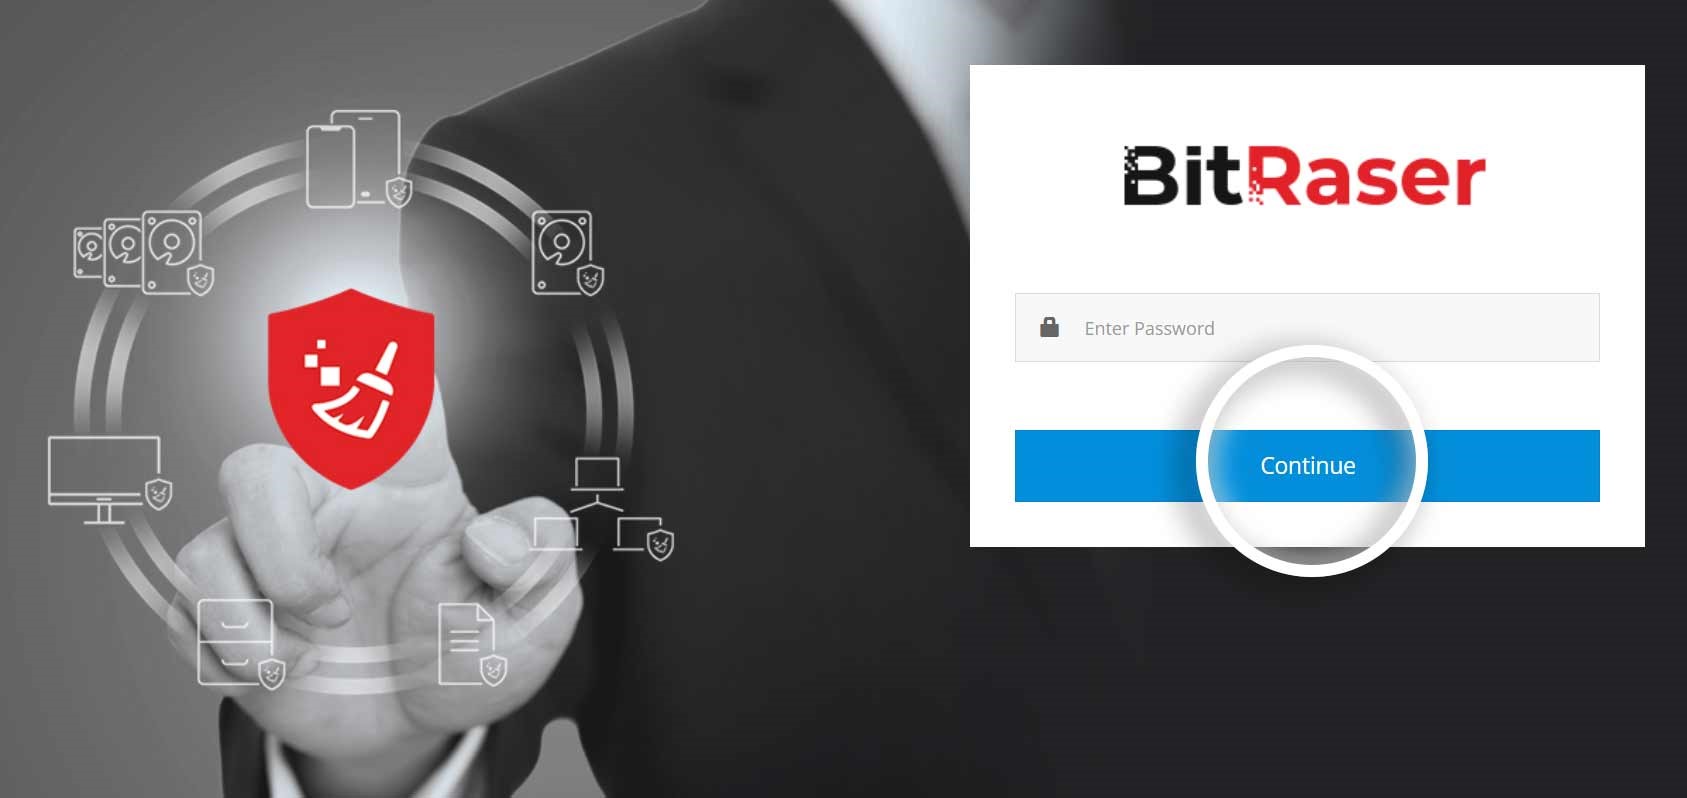
Enter your password again to start the process of BitRaser ISO customization.
Step 4: After clicking on this, you will be able to view your product’s ISO. Choose the product’s that need BitRaser ISO customization.
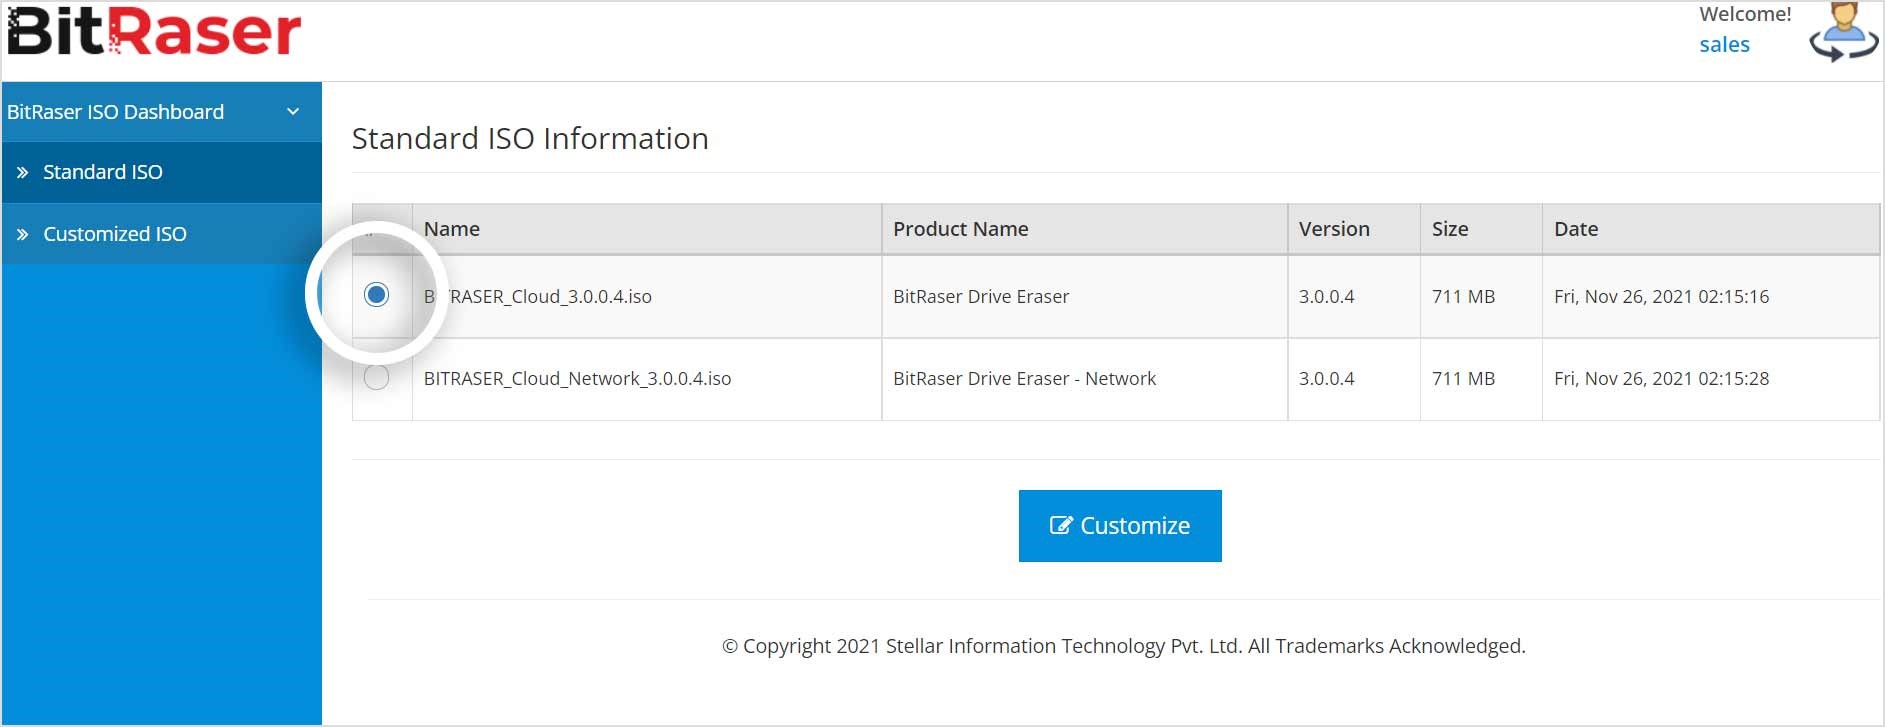
Step 5: Now you have to pre-configure many data fields and functions to modify Bitraser ISO for BitRaser ISO customization.
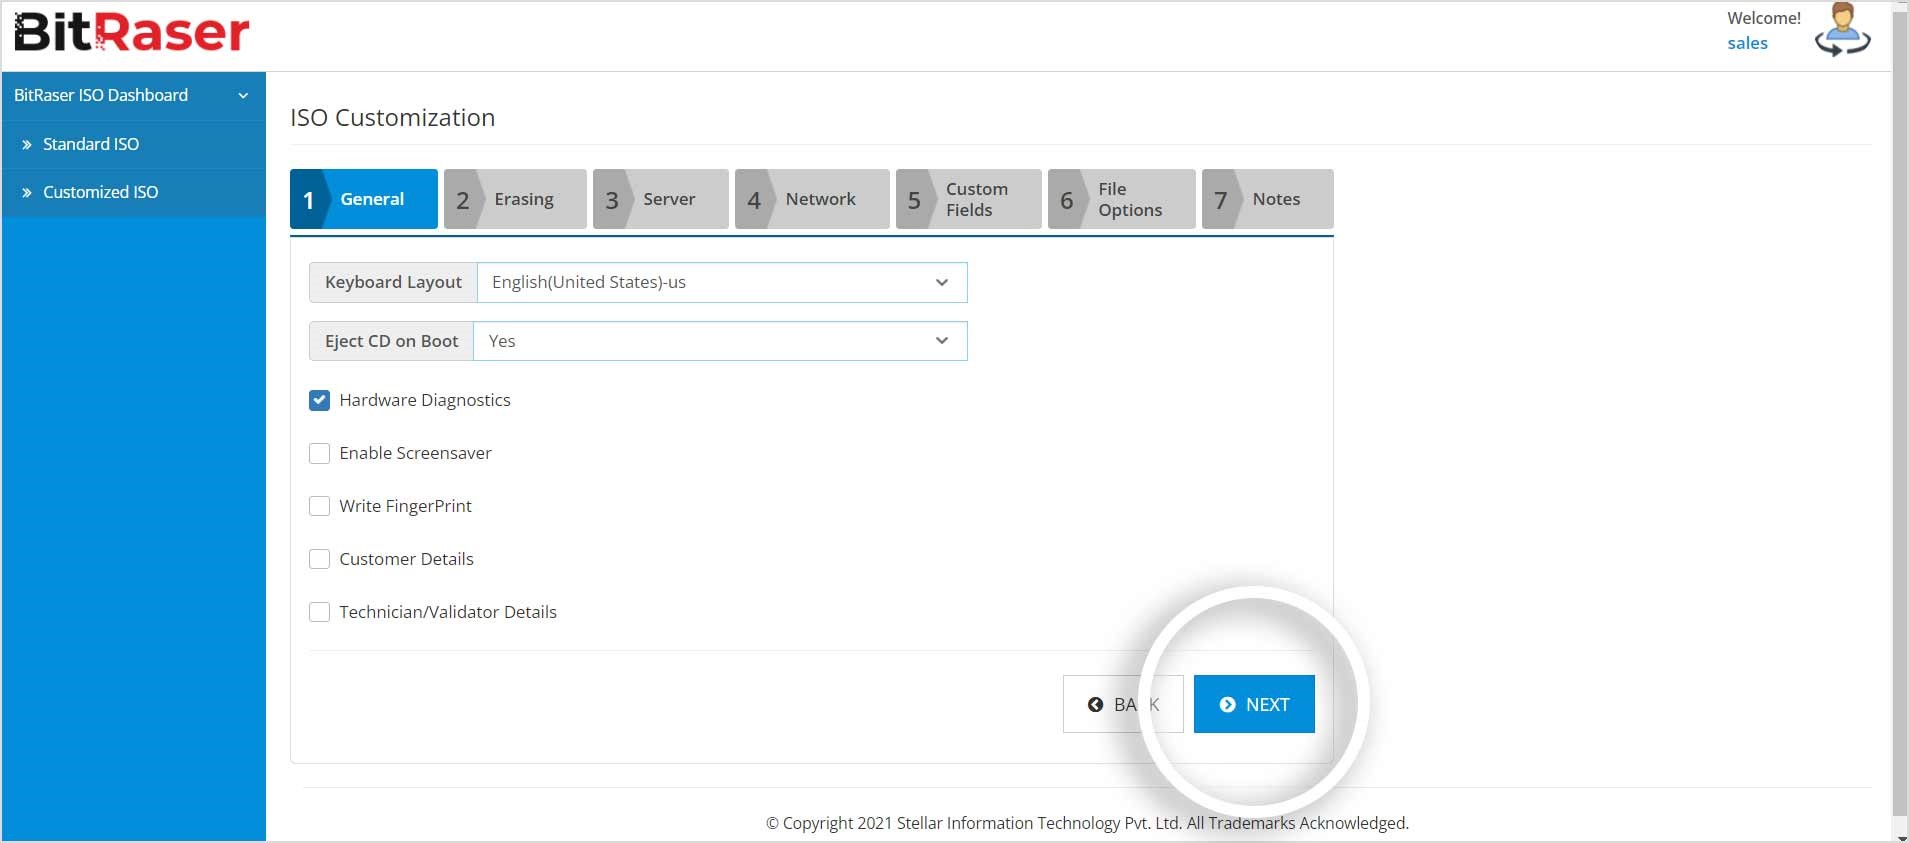
This is how you can pre-configure the data fields.
- Go to ‘General’. You can choose ‘keyboard layout’, ‘eject CD on boot’. The keyboard layout will help you change the language that BitRaser uses on the screen and help you access accent marks and other specialized characters. If you select yes for eject CD on boot, your CD/DVD will be automatically ejected after software installation.
- You have to choose whether to perform- Hardware Diagnostics (performs hardware diagnostics on your system), Enable Screensaver (enables a screensaver that shows you the process status such as erasure completed, failed, or in progress) or Write Fingerprint (allows you to write a fingerprint at a drive sector after the erasure process).
- You can also fill in customer and technician-validator details.
- Click the ‘Next’ button.
Step 6: The ‘Next’ button will show you the screen below.
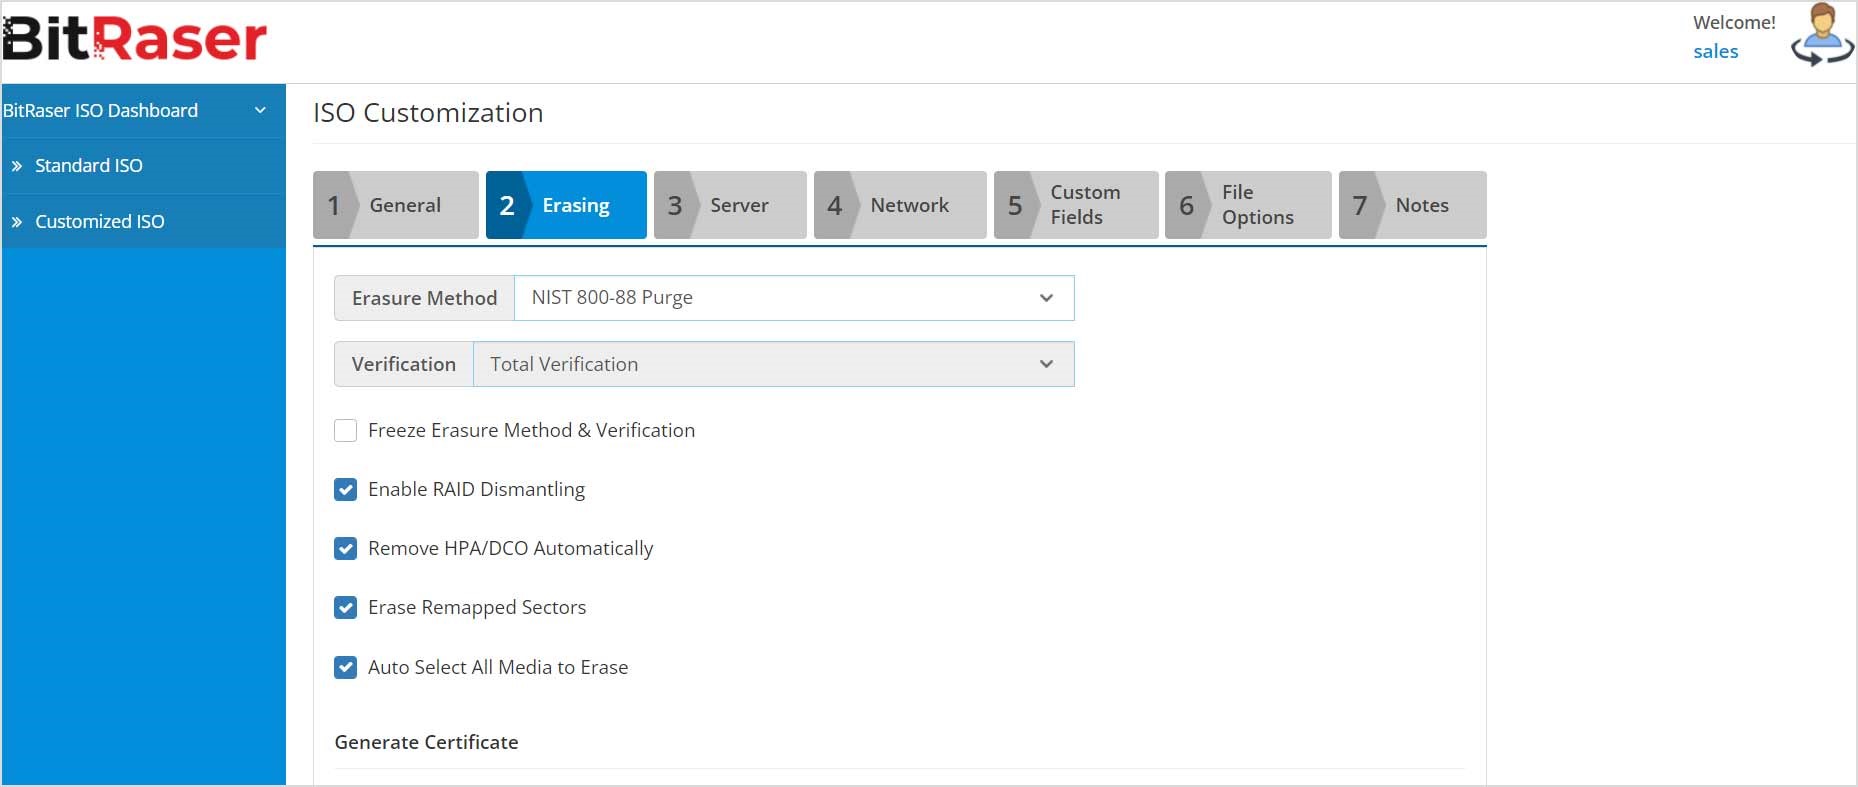
Now that you are at the ‘Erasing’ tab, you have to:
- Choose the erasure and verification method. This ensures consistency of the erasure standard across drives that you need to erase.
- If you don’t want any other user to change the data wiping method, you can freeze the erasure method while performing the erasure. Just tick the box that states ‘Free Erasure Method & Verification.’
- There should be four other customizations on your screen: RAID Dismantling’, Remove HPA/DCO automatically, Erase Remapped Sectors, or even Auto Select All Media to Erase.
- You can also choose whether to generate certificates individually or collectively in this section. In ‘Bad Sectors Limit’, enter the number of bad sectors on which you want to stop the erasure process. In ‘Bad Blocks Limit’ enter the number of bad blocks on which you want to stop the erasure process.
- You can also use the erasure options to define bad sector settings. This will help you save time on erasing drives that have bad sectors.
Step 7: Go to the ‘Server’ tab by clicking ‘Next’.
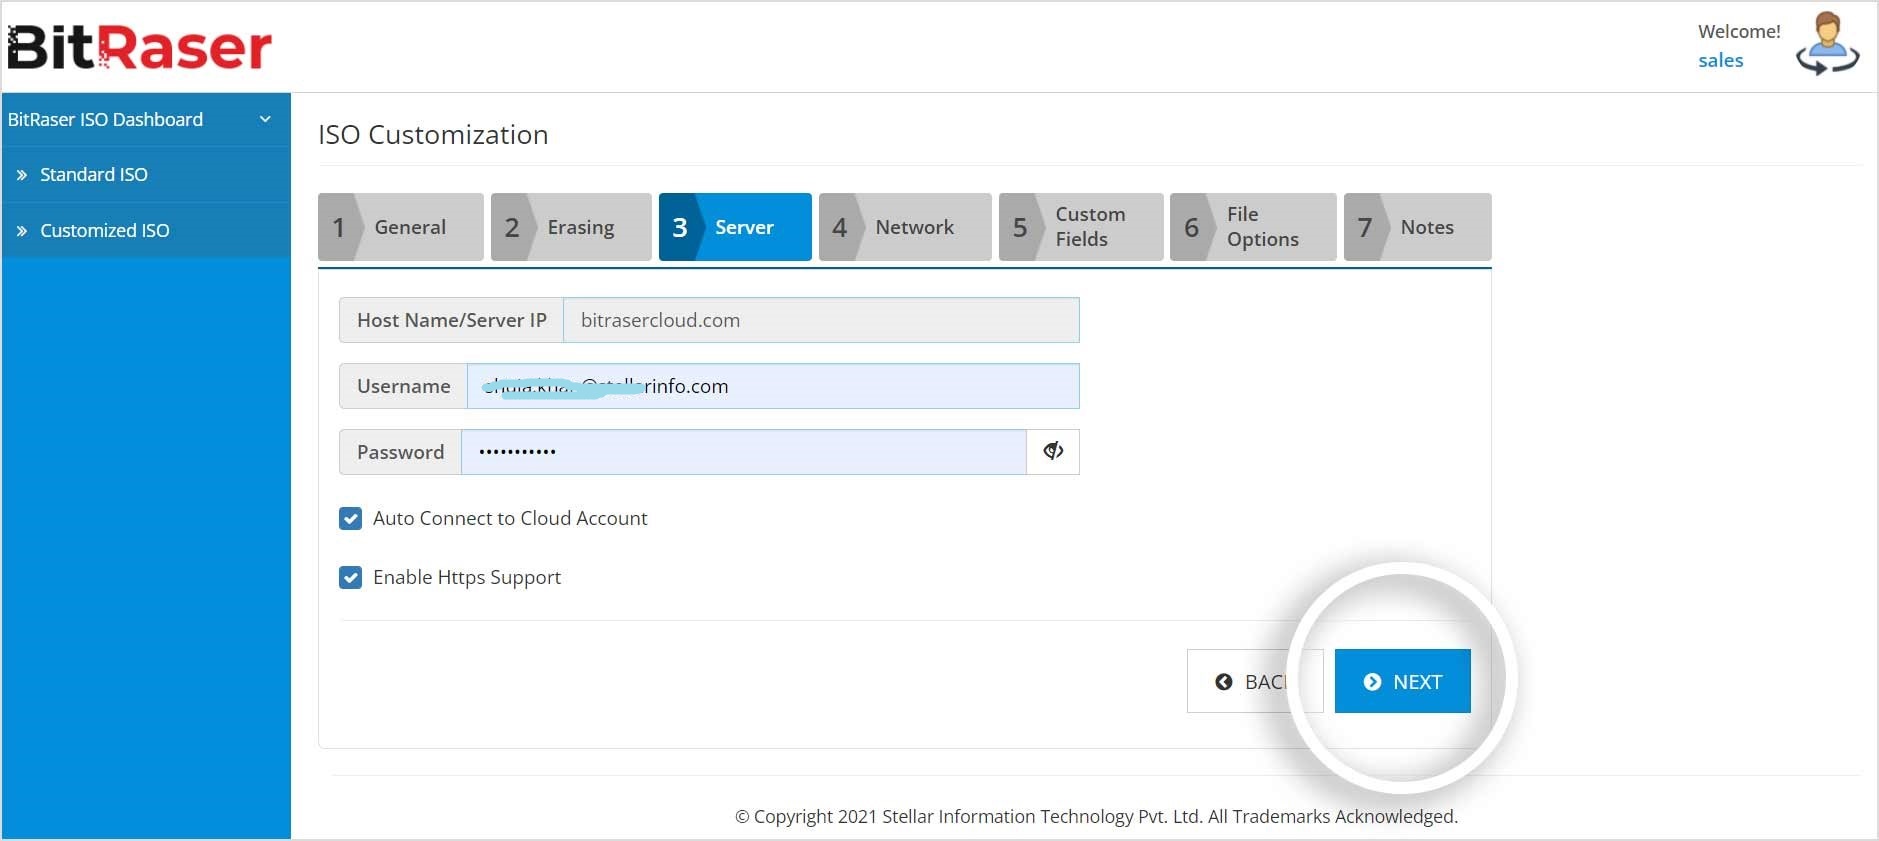
The hostname with server IP will be pre-filled.
You have to enter your username and password. This eliminates the need for manual entry of login credentials every time you run BitRaser Drive Eraser on a machine.
You can also enable auto-connect to your BitRaser cloud account, to get access to your data erasure licenses.
Step 8: Go to the ‘Network’ tab by clicking ‘Next’.
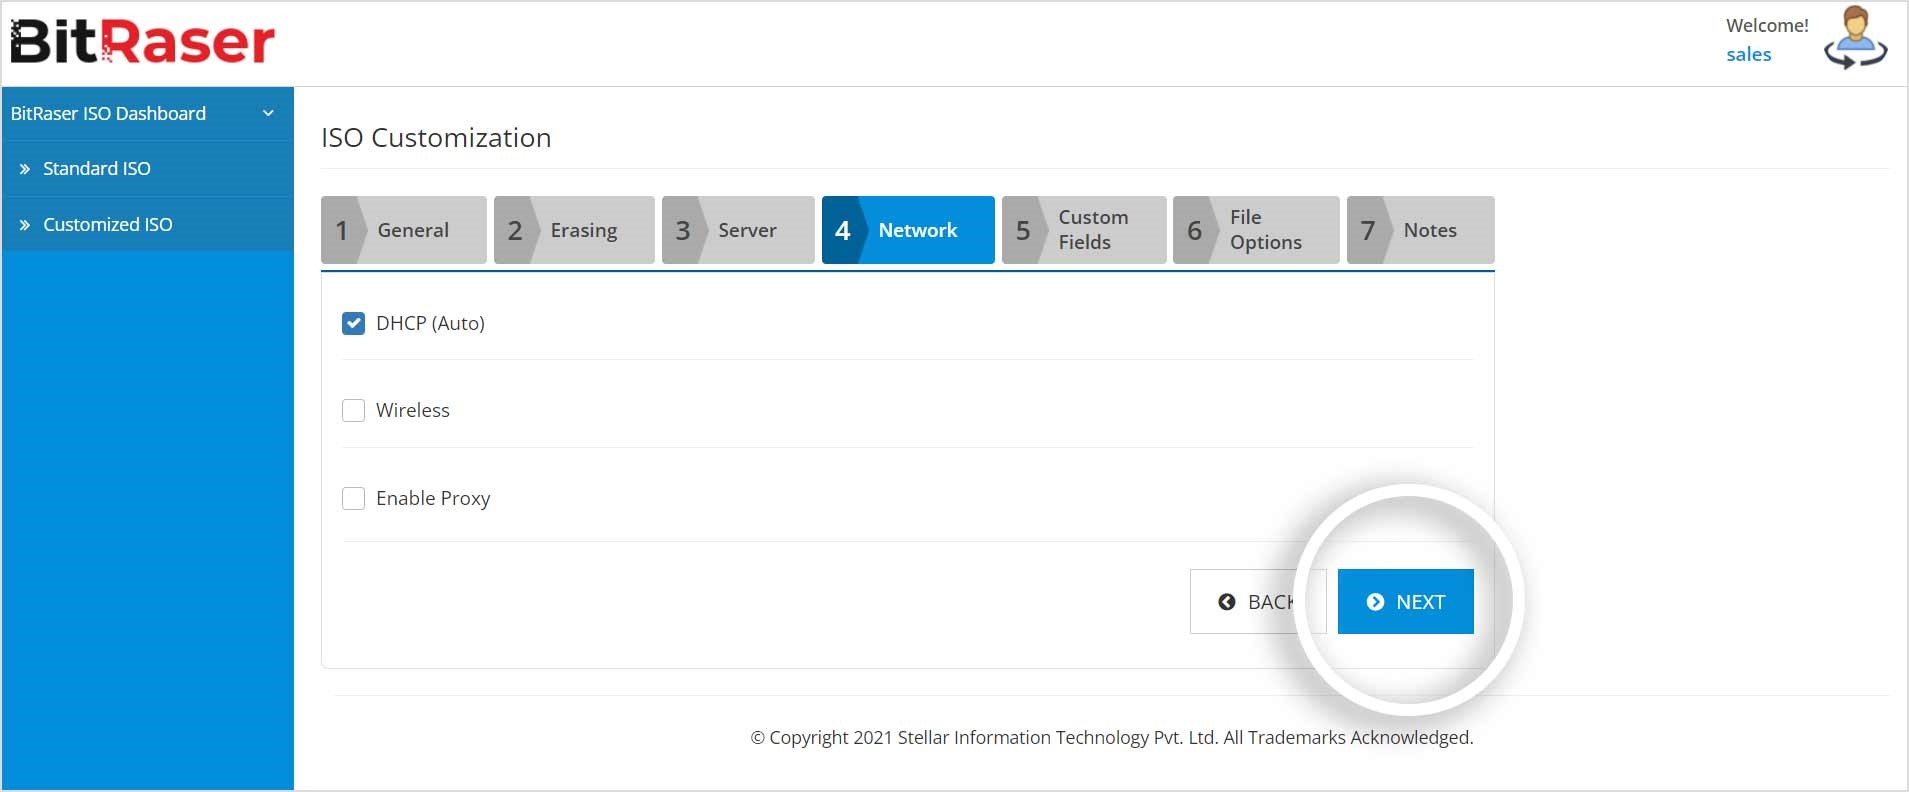
The DHCP(Auto) option is selected by default.
But you can pre-select your desired network connection. This eliminates the need for manual network configuration on every machine you run BitRaser Drive Eraser on.
The other options are Wireless and Enable Proxy.
Step 9: Go to the ‘Custom FIelds’ tab by clicking ‘Next.’
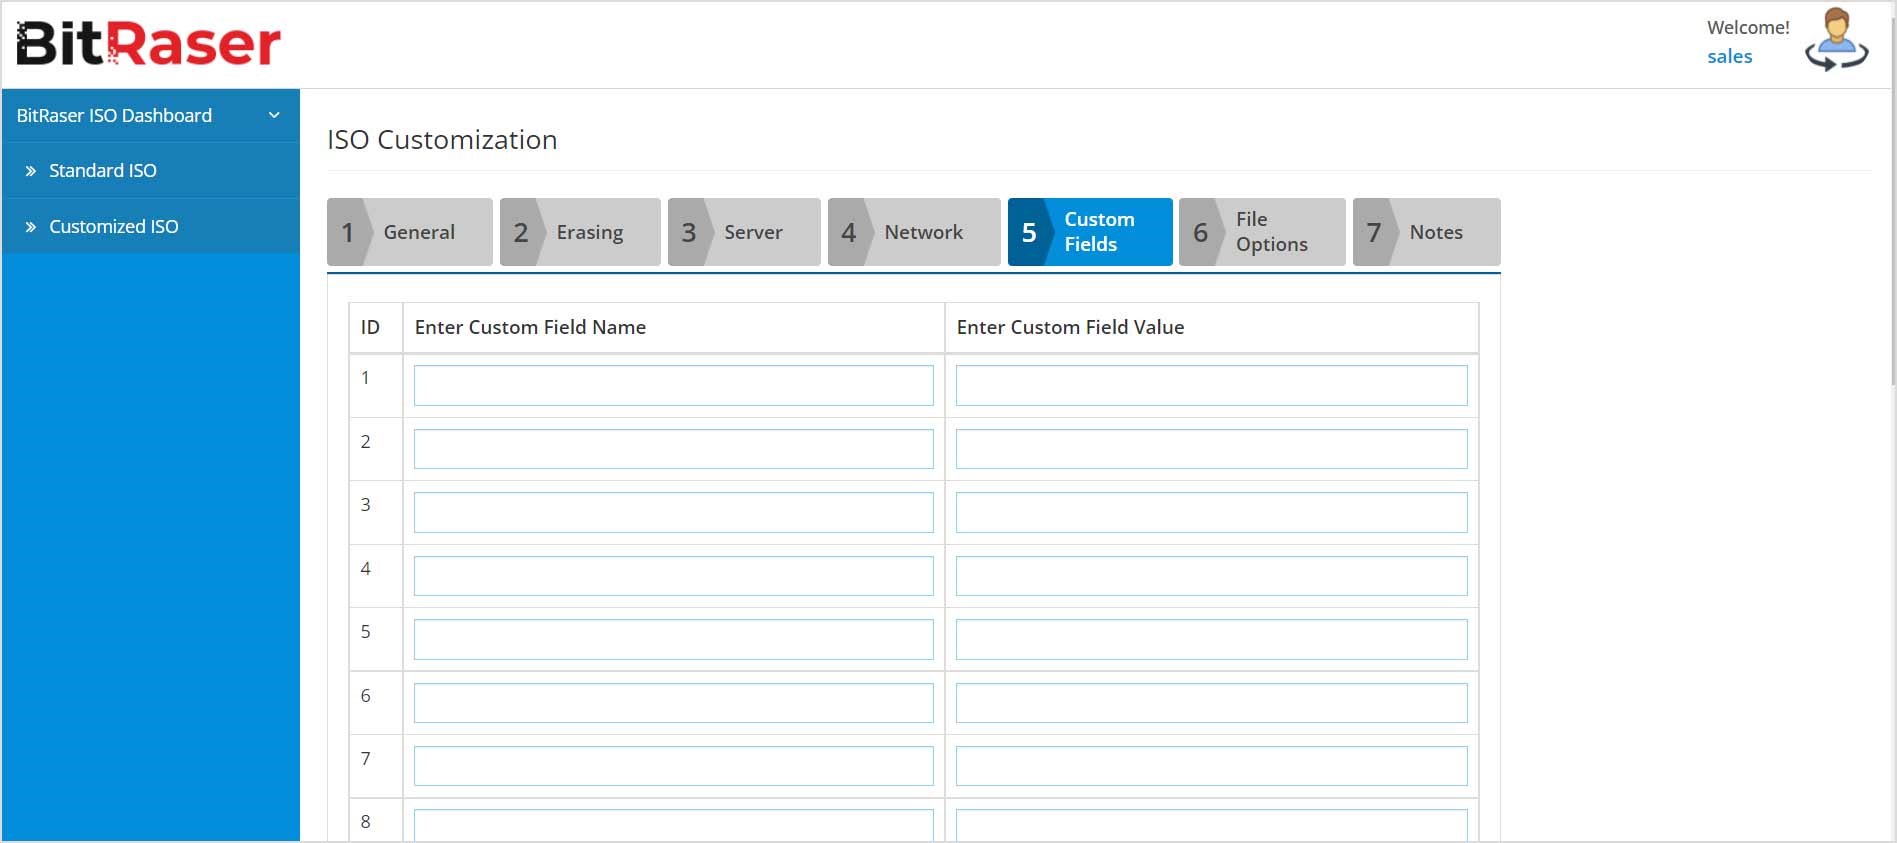
In this tab, you can define default custom fields to capture the required values for each device at the time of erasing it.
Enter custom field names and custom field values. You can customize up to 20 fields.
These custom fields also reflect in the Erasure Reports.
Step 10: Click on ‘Next’ to save the custom fields and move to the ‘File Options’ tab.
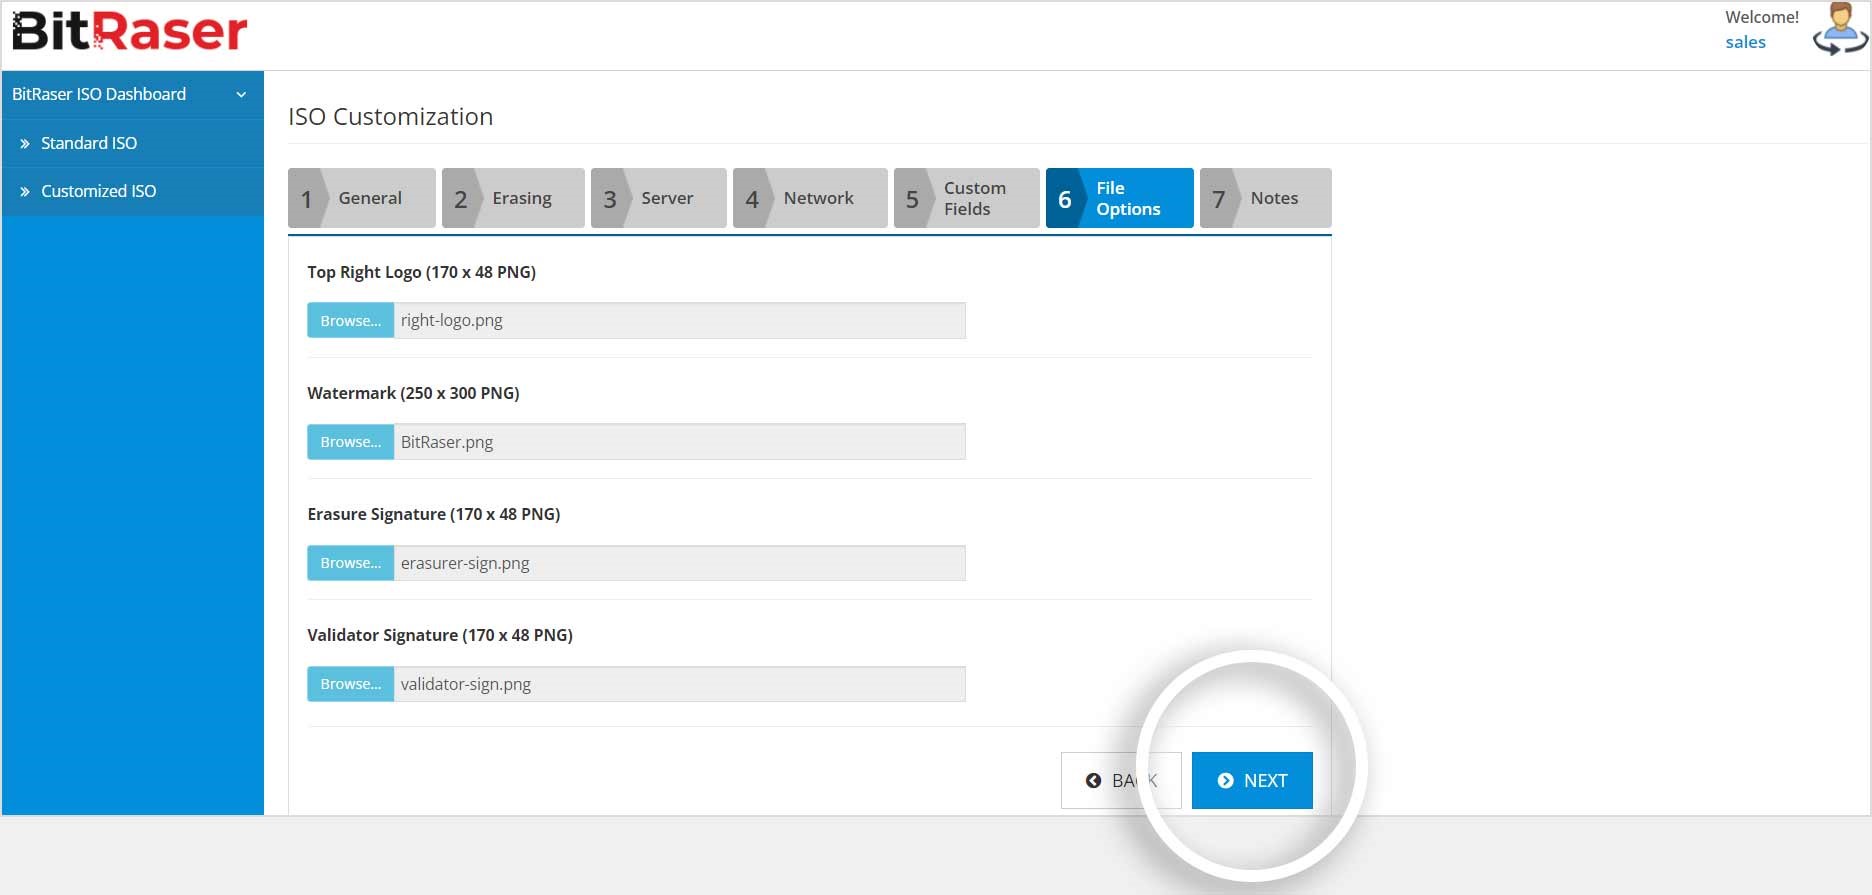
In this tab, you can customize erasure reports with your company logo, watermark, technician details, and so on.
You have to:
- Upload the logo as per the size dimensions mentioned (170X48 PNG).
- Customize the watermark (250X300 PNG).
- Customize Erasure Signature to 170X48 PNG.
- You can also include Validator’s Signature (170X48 PNG).
After this, click on the ‘Next’ button. This will allow you to state any further comments or notes about the present ISO configuration settings.
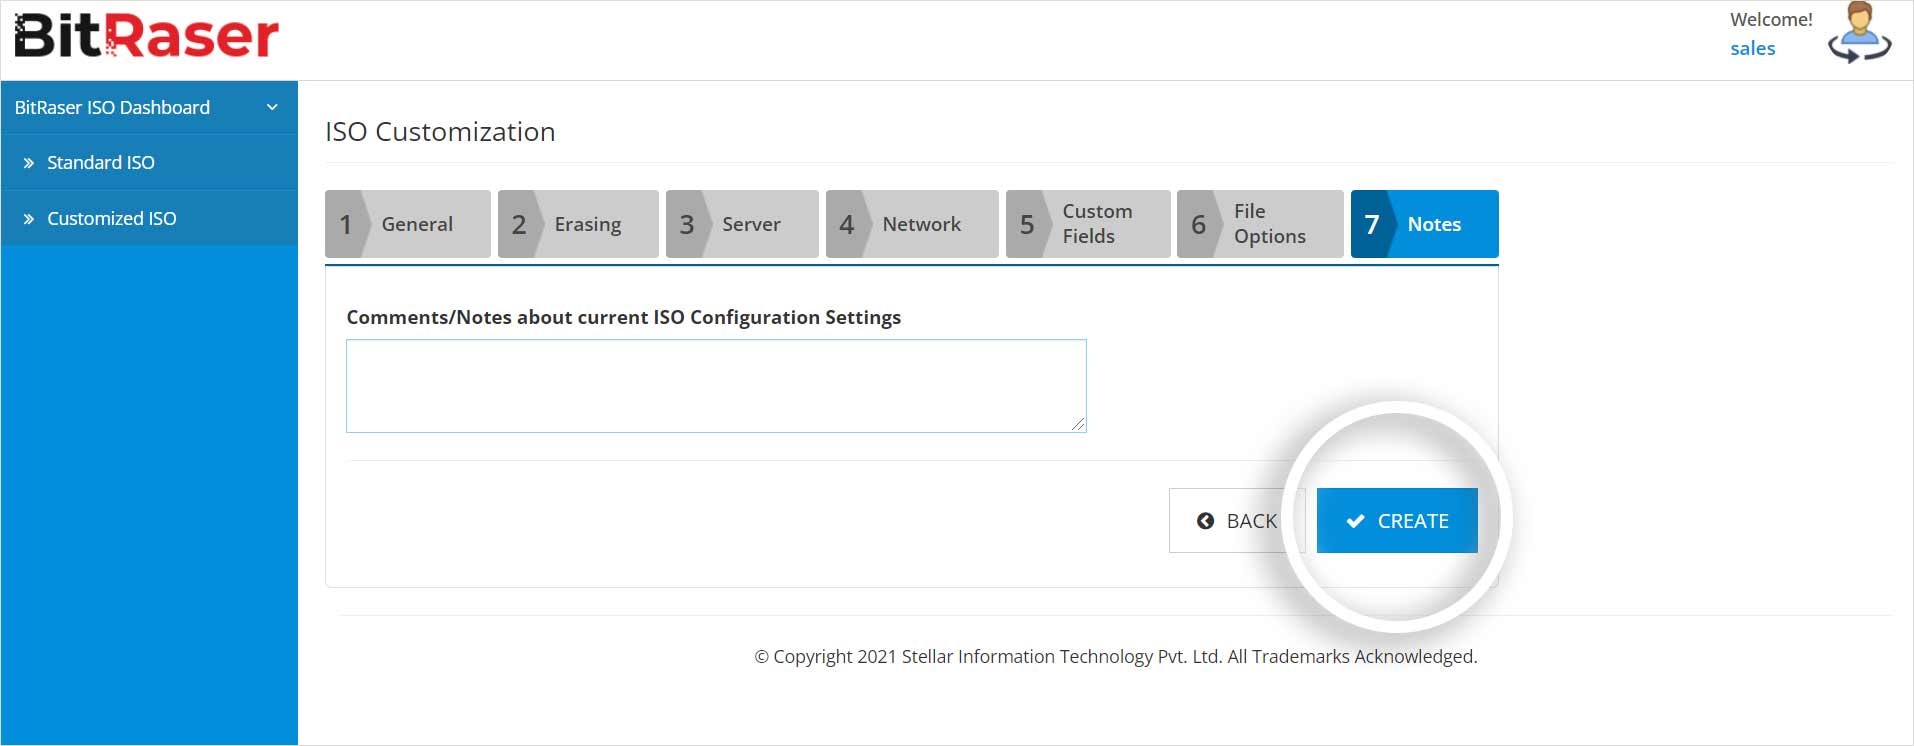
This will help you identify the setting used in a customized ISO when you have more than one ISO customized for your work.
Step 11: You will see two options: ‘Back’ and ‘Create’. Click on ‘Create’ to kick-start the ISO creation process for BitRaser ISO customization.
We recommend that you use ‘Back’ to check the previous settings and make edits wherever needed. Because, once the ISO creation process has started for BitRaser ISO customization, you cannot stop it.
If you try closing the browser window/tab at this step or try logging in again to the ISO customization console, it will show an error.
If you realize any edits have to be made, let the process finish. After the process has finished, you can log in again and make further changes.
Step 12: A ‘Please Wait’ message will flash on your screen while BitRaser ISO customization is in process.
Once done, download the ISO, and burn it to the USB using freely available software – rufus.ie.
With the ISO customization console, you can create up to three customized ISO files for download. If you try to create a fourth one, it will show an error message. In this case, you can delete an old ISO file by clicking on the extreme right delete button on the ‘Customized ISO’ tab.
We hope these steps helped you customize the BitRaser Drive Eraser ISO.

