| Summary: On a cold December day in 2022, unsuspecting Rackspace email customers found their emails suddenly unconnected. Little did they know the issue was actually due to an enormous security breach – one which caused disruptions and panic throughout corporate empires worldwide. While it took some time before the cause of this incident came to light, organizations everywhere have now been forced into action to ensure that such attacks never happen again on their networks.
To fix this issue users can Download stellar converter for OST, the demo link is shared below. |
|---|
Table of Content:
- Methods to Restore Email Service and Migrate Mailboxes to Microsoft 365
- Use Email Forwarding
- Use Rackspace® Archive Service
- Perform OST to PST Conversion
Rackspace is a well-known multi-cloud service provider company. They provide managed cloud hosting services for businesses, including webmail and Hosted Microsoft Exchange Servers.
On December 2, 2022, Rackspace email services went down. Customers who were using Rackspace® Hosted Exchange Servers for business email began experiencing connectivity issues. However, the issue turned out to be a major security incident.
Subsequently, the company admitted that they have been at the receiving end of a ransomware attack and immediately isolated their Hosted Exchange environment to protect customer data and contain the incident.
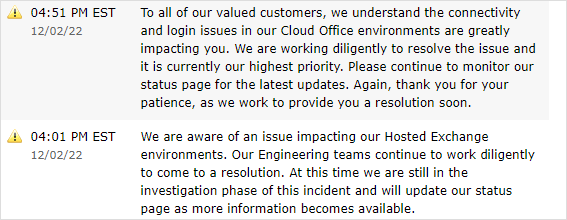
They have also hired a leading cyber security firm along with their internal security team to investigate the attack and find out if their customers’ data was affected. But they haven’t shared any ETA or timeline as to when it will be resolved.
While Rackspace® is continuously working to resolve the outage, they have advised their customers to migrate to Microsoft 365 platform. To prevent downtime and ensure customers can continue email service, Rackspace® offered its customers access to Microsoft 365 E1 license at no extra cost.
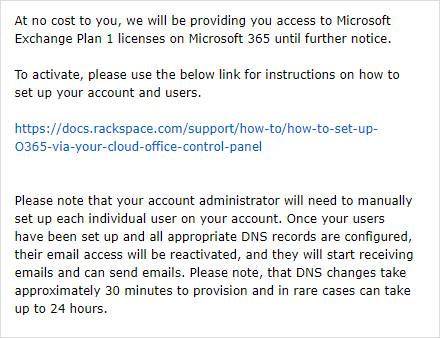
However, it’s not an easy task as any email migration comes with a host of problems.
In this article, we try to untangle the situation and share three concrete methods to help you restore the email service and migrate affected users’ mailboxes from the Rackspace® Archive Service and local Outlook OST files to Microsoft 365.
Methods to Restore Email Service and Migrate Mailboxes to Microsoft 365- Move Emails From Rackspace to Microsoft 365
Since the Rackspace® Hosted Exchange environment is down, users can neither send/receive emails nor can they access their mail items. Below are the methods that you can implement to restore the email service and the user mailboxes to ensure business continuity until Rackspace resolves the outage.
Use Email Forwarding
You can set up a Microsoft 365 tenant and use the email forwarding option to route the emails destined for Hosted Exchange Server to Microsoft 365 or any other external email address.
For this, you can utilize the free access to Microsoft 365 offered by Rackspace® to set up a Microsoft 365 tenant—an organization accessing Microsoft 365 and the services offered by the subscription bundle.
The steps are as follows:
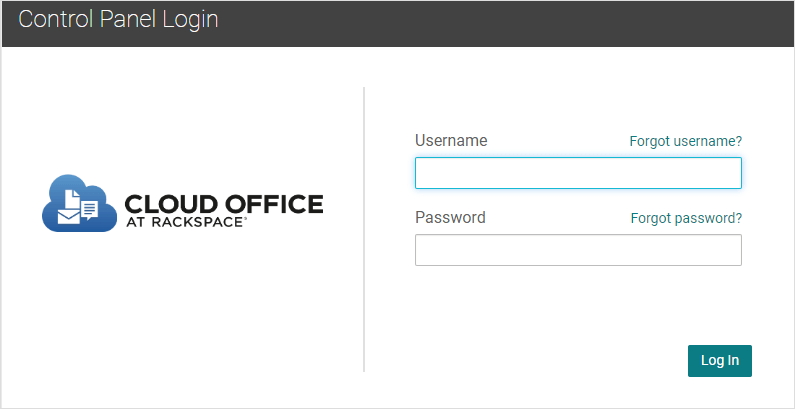
1. Log into the Cloud Office Control Panel using Rackspace ID and password.
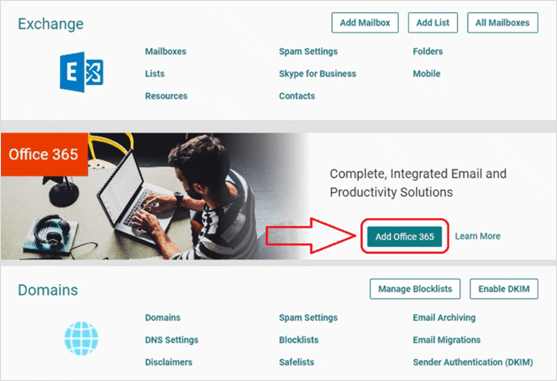
2. You will find an option to add Office 365.
3. Add the requested information to create a tenant.
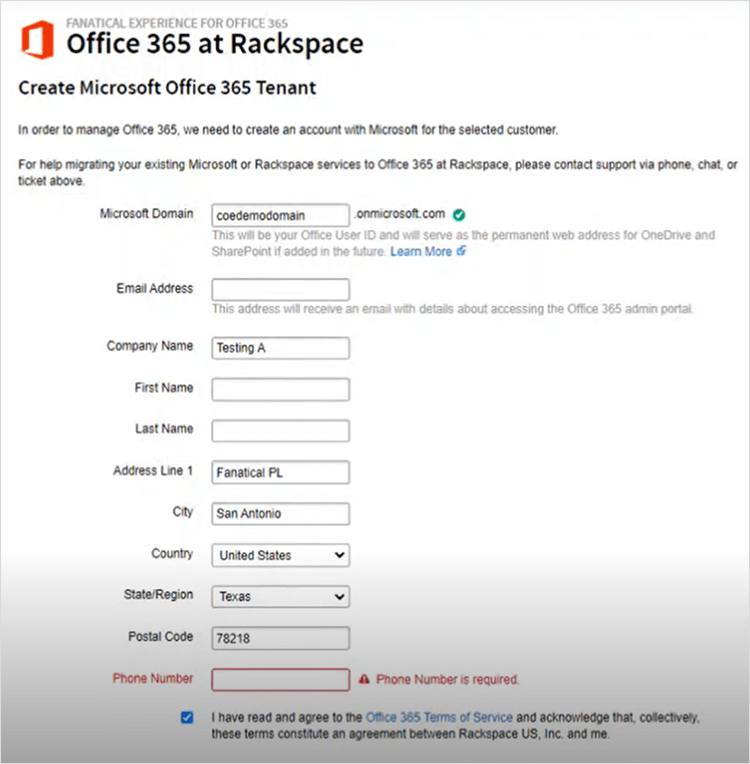
4. Save tenant ID.
5. Log in to the Rackspace Office 365 portal.
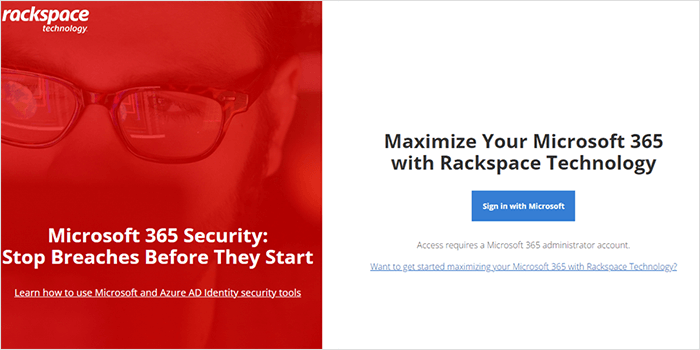
6. At Rackspace Office 365 Management Page click on Product Catalog > Select Microsoft365 > Select Exchange Online Plan 1 > Add Product.
7. You would need to add the license received from Rackspace.
8. Now choose the password for admin@{tenantName}.onmicrosoft.com at Office 365 portal.
9. After this, you can add a domain name, and add DNS records.
Important Note: By using this method, you have successfully routed your email hosting service from Rackspace® Hosted Exchange to Microsoft 365. While users can now send/receive emails, they won’t have access to their mailbox items at Rackspace®.
You can find detailed steps in the document shared by Rackspace here.
Use Rackspace® Archive Service
Though Rackspace Hostage Exchange is down, their Archive Service is up and running.
To take advantage you need to have subscribed to the Archive Service before the incident occurred. The steps are as follows:
1. Log into the Cloud Office Control Panel using Rackspace ID and password.
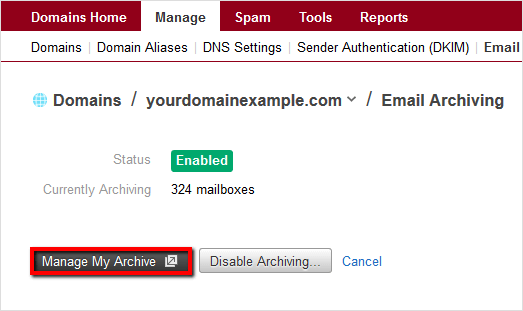
2. Scroll to Domains > Email Archiving.

3. Select the domain whose archive you want to access.
4. Click on Manage My Archive.
5. Create an Archive Search.
6. Select emails to export.
7. Select a format EML, PST, or PDF
8. Download the PST file.
9. You need to repeat it for each user.
10. Now upload the PST files to Microsoft 365.
It can take a lot of time especially if there are several users. The search and export feature can export up to 30,000 emails at once. Thus, you need to repeat these steps multiple times to export all emails.
Those who did not sign up for Rackspace Archive Service feature cannot use this route. They can migrate the emails and other mail items from the local OST files created by Outlook to Office 365.
For more details, refer to the Rackspace document here.
Perform OST to PST Conversion
An OST file (Outlook Storage Table File) is a local copy of the user’s mailbox saved on your PC containing emails, calendars, contacts, notes, etc. Outlook creates an OST file when a user adds or signs in using their Outlook 365, IMAP, Microsoft Exchange, or Outlook.com account.
If your users were using Outlook client for Rackspace Hostage Exchange Server email account, a synced copy of emails should be available on their local device at %localappdata%/Microsoft/Outlook.

You can download and use an OST to PST converter software, such as Stellar Converter for OST – Technician to export the mail items from the local OST file to Microsoft 365 mailbox directly using secure Microsoft Modern Authentication.
Also Read: Free OST to PST Converter Tool – Stellar Converter for OST
The steps are as follows:
Step 1: Add Microsoft 365 Account to Outlook
Create user accounts in Microsoft 365 tenant, assign licenses and then share the credentials with the users. Ask them to add the Microsoft 365 account in Outlook.
Also, ask them to download and install the Stellar OST to PST Converter software on their PC. Get the activation keys and share them with the users for the software activation.
To activate the software, users need to click on the Activation button under the Activation tab in the software and then enter the activation code.
Step 2: Scan and Convert Local OST File
Once the software is activated, launch the software and follow these steps,
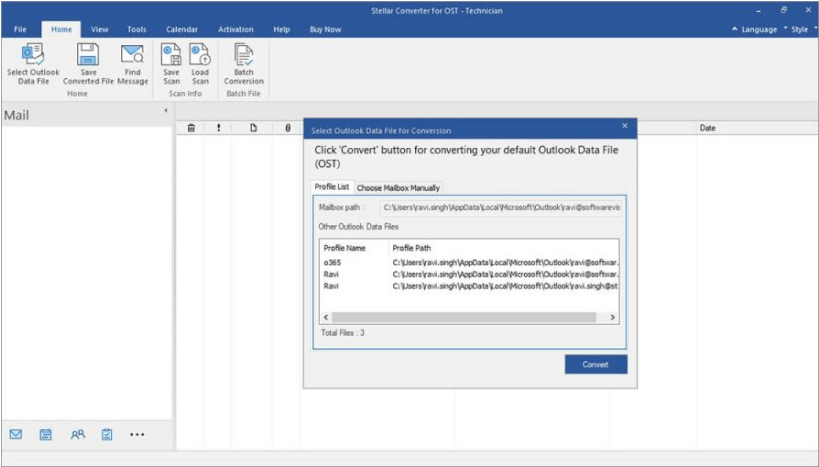
• As soon as you or the user launches the software, it automatically locates the OST files from the default location and lists them under the Profile List tab.
• Users need to select the OST file linked with the Rackspace Hosted Exchange account and then click Convert. If the OST is located at a different location, use the Choose Location option.
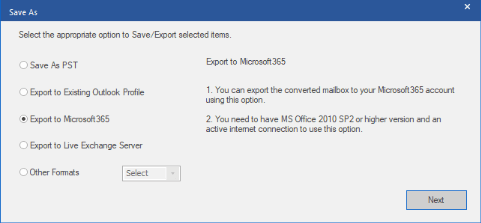
• After the conversion, click Save Converted File button and then choose Export to Microsoft 365. Click Next.
• Select the Microsoft 365 profile (which the user has already added to Outlook in Step 1) and enter the password.
• Click OK. The software will establish a secure connection with the Microsoft 365 user’s mailbox using Microsoft Modern Authentication and export the mail items, such as emails, contacts, attachments, notes, tasks, etc. directly to the user’s mailbox on the Microsoft 365 tenant.
As an administrator, you may also ask users to share their OST files with you. You can then scan and export the mail items from the OST file to the user’s mailbox on Microsoft 365 using the Stellar Toolkit for Outlook.
Alternatively, you may also use the Batch Conversion option in the software to select and convert multiple OST files to PST files simultaneously and then import the PST files to users’ mailboxes via the Network Upload method or Outlook Import Export wizard.
Also Read: How to Fix OST Error “File Access is Denied”?
To Wrap Up- Move Emails From Rackspace to Microsoft 365
If you are not a tech wizard or don’t want to spend hours on the phone or email with Rackspace customer care (if they are at all available) take the quick and easy route. Use Stellar Converter for OST Technician to migrate your users’ mailboxes from their local Outlook cache or .OST files directly to Microsoft 365 with complete integrity. The software helps even if you don’t have a local backup or subscribed to Rackspace® Archive Service.
For more help, you can always reach out to us via the comments section down below or contact us via our support page.


