|
Summary: This post shares the most effective ways to recover deleted photos from a laptop or PC. Whether you have Mac or Windows laptop, you can easily get your lost photos back using these methods. |
|---|
Scenario 1: I accidentally deleted a folder of pictures (JPEG format). Can you please suggest how can I recover those photos?
Scenario 2: My laptop’s storage is almost full. I have accidentally deleted my important pictures while removing the unwanted data. Can you please suggest a way to get my photos back?

Scenario 3: I have mistakenly deleted my photos. When the message popped up asking to permanently delete them, I clicked “Yes”. They were too large to go to the Recycle Bin. So, they are permanently deleted from my laptop. Can you please help me recover my photos?
Scenario 4: I was copying the photos from Drive E to Drive F and my laptop got switched off due to no battery. When I turned the laptop on, there were no photos. Please suggest how to recover deleted photos from a laptop.
Scenario 5: I can’t find photos that I stored in the D drive of my laptop. They are not in the Recycle Bin. It seems that my HDD is corrupt. Where are my photos? Are they permanently deleted from my laptop? How can I get them back?
Scenario 6: I have run the system cleaner app on my laptop. Now, I am unable to find some of my photos. How can I bring those photos back?
These are some cases of photos loss from laptops that people encounter. Unfortunately, in such instances, it is difficult to recover photos. Luckily, the below-mentioned ways will help you to recover photos lost due to any logical reason.
1) Go to “Previous Versions” in Windows or “Recently Deleted Photos” in Mac
- If you have Windows PC, you can restore the deleted photos by using the “Restore Previous Versions” feature. Follow the below steps:
- Right-click on the folder from which you have deleted the photos.
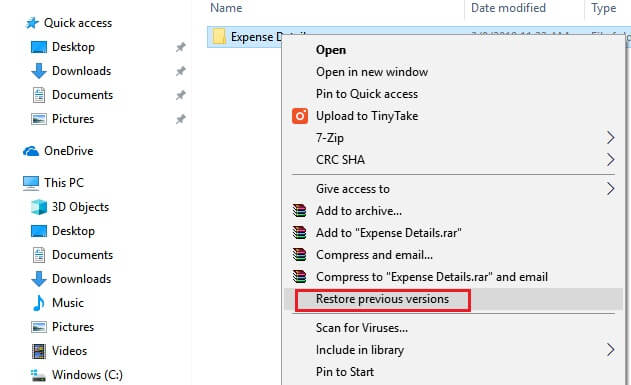
- Click on “Restore Previous Versions”.
- In the dialog box that opens, click on the tab “Previous Versions”. Then, select the version when your photos were in that folder.
- Choose the previous version and click on “Open” to ensure that it’s the version that comprises your deleted photos.
- Finally, click on “Restore”.
To recover deleted photos on Mac, you can use the option – “Recently Deleted Photos”. The photos app on Mac has a feature that allows the users to restore deleted photos within the 30-day time period. Follow the below steps:
- Launch the Photos app.
- Find the “Recently Deleted” option from the Albums and double-click on it.
- Preview the deleted photos.
- Then, click on “Recover”.
2) Restore from Backups
Windows has a built-in “Backup and Restore” feature, while Mac has “Time Machine”.
If you have already turned on the backup feature on your Windows laptop, follow the below steps to restore the deleted photos.
- Go to “Control Panel”.
- Click on “System and Security” à “Backup and Restore” à “Restore my files”.
- Then, save your deleted photos to a new location, other than the location from where you’ve lost them.
On Mac, you can use the Time Machine feature to restore deleted photos. First, make sure that it has already been activated. Then, go through the following steps:
- Open the folder from where you have deleted the photos by using Finder.
- Click on the icon of Time Machine from the Menu Bar.
- Select “Enter Time Machine”.
- Use the arrows icons on the right side of the screen to go back in the time, where you can see your deleted photos.
- Finally, click on “Restore”.
3) Recover Deleted Photos from Laptop using Photo Recovery Software
If you don’t have any backup, then you can use photo recovery software to recover deleted photos from the laptop. There are many photo recovery software available in the market. One among them is Stellar Photo Recovery Software that supports both Windows and Mac OS. It can help you recover deleted or lost photos, videos, and music files in just a few clicks.
Also Read: How to recover deleted photos?
Steps to Recover Deleted Photos from Laptop using Stellar Photo Recovery
Step 1: Download, install and launch Stellar Photo Recovery software on your laptop.
Step 2: Select the location from where you’ve deleted the photos. Then, click on “Scan”.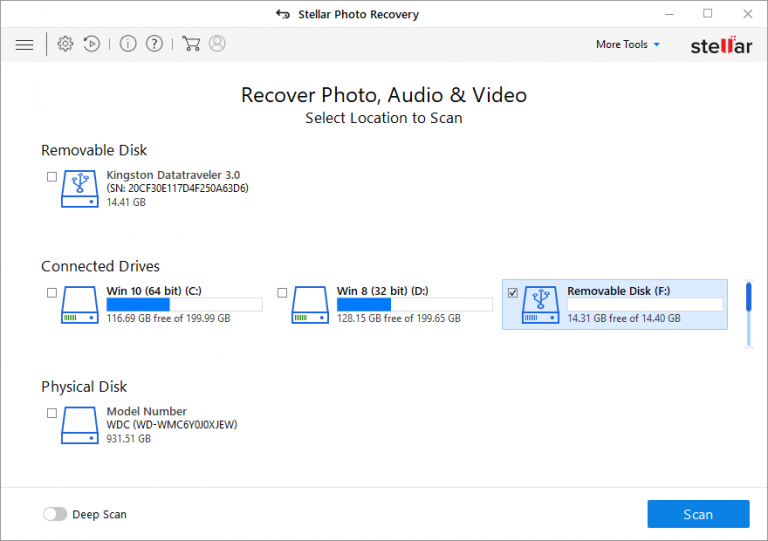
Step 3: Once the scan is finished, preview the recovered photos.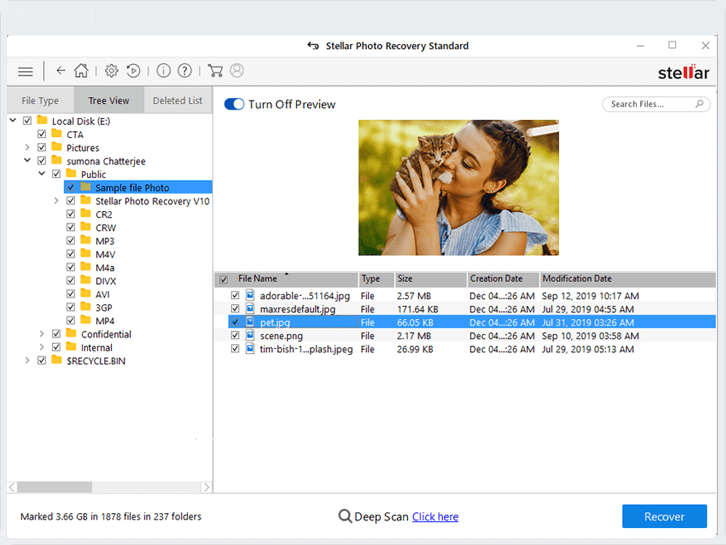 Note: If you can’t find your deleted photos after the Quick Scan”, click on “Deep Scan” at the bottom of the screen for a thorough search.
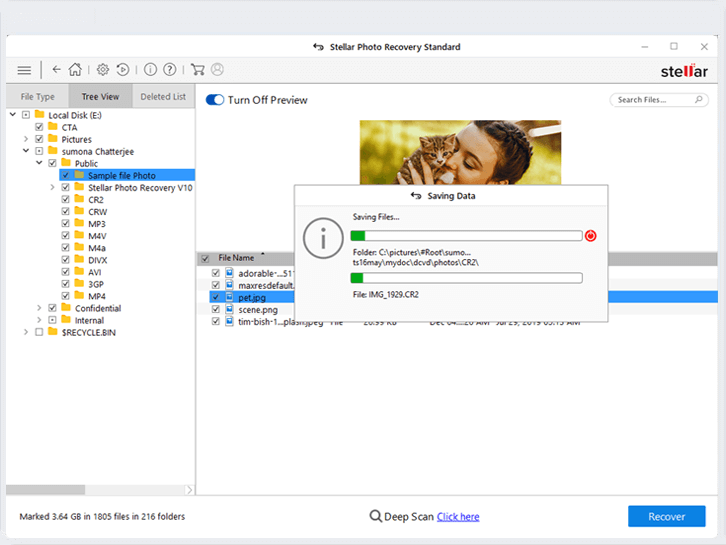
Step 4: Once you find the deleted photos, click on “Recover”.
Step 5: Click on “Browse” to choose the desired location to save the recovered photos.
Reminder Alert! Don’t save the recovered photos at the same location, from where they have been deleted or lost. Instead, choose a different drive to save the recovered photos
Why Choose Stellar Photo Recovery?
- It recovers photos with the original date timestamp.
- It restores photos without hampering their original quality.
- It supports unlimited formats of photos.
- It has the “save scan and resume recovery later” feature.
- It recovers RAW file formats of many well-known DSLR brands, like Canon, Nikon, Sony, etc.
- It assures you complete data safety while recovering photos.
- It is 100% secure and reliable photo recovery software.
Note: You can download the free demo version of Stellar Photo Recovery Software to scan and preview the recovered photos. If you are contented with the quality of the pictures, you can purchase the activation key of the software and save the recovered photos effortlessly. Tips to Increase Chances of Photo Recovery
- Stop using the drive partition immediately once you realize that the photos are deleted.
- Don’t add new photos or other files to it.
- Don’t choose any random software. It costs you even more than losing the photos.
- Recover your photos as soon as possible.
Bottom Line
By using the above-mentioned photo recovery methods, you will be able to recover lost or deleted photos in no time. If you don’t have a backup of your photos, then the only way to recover deleted photos is by using Stellar Photo Recovery Software. It can also recover photos from corrupt, formatted, or inaccessible drives of your laptop.


